Today I'm sharing how to make a
template-free, no-fuss, perfectly-pointed block
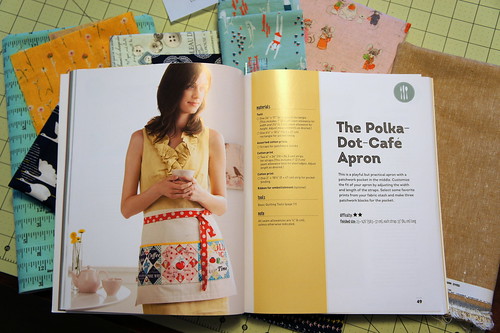
from the Polka-Dot-Cafe Apron project
 |
| Photo Credit: Cut to Pieces blog |
The apron was one of the projects that I loved most,
when I first paged through the book.
That block design is just so adorable!
But, alas...I felt more than a little bit inadequate
when my lovely blocks were stitched together.
As careful as I was, my points disappeared into the seams
when I trimmed the blocks and stitched them together.
I was not alone...almost everyone else in the Zakka 2.0 sew along
expressed some degree of frustration, too.
I vowed to try again someday, to figure out a better way.
Recently I decided to draft the block,
using some "round" numbers and see if I could have better luck.
 |
These are the "finished" measurements I used to draft my block, so I added 1/2" to each element.
The final block is 6 1/2" square. |
It worked!
I'm pleased to show you my method,
if you'd like to make this design, too, without templates.
Fabric Selection:
For my blocks, I used (1) center block A
and (4) contrasting block A pieces surrounding the center.
I used another fabric for all (4) of the small B blocks.
For the remaining triangle pieces, C and D,
I used the same fabric throughout.
Here's how my first trial block turned out,
made in Christmas prints for "Christmas In July".
Cutting Measurements:
NOTE: I added 1/2" to each of the elements of the block
A (5) 2 1/2" squares - the center square is of a different print
B (4) 1 1/2" squares
C (4) 2 1/4" squares, cut diagonally to make 8 triangles
D (2) 3" squares, cut diagonally to make 4 triangles for corners
I found it easier...and prettier...to cut out
the pieces for several blocks.
Let's get started with the sewing process for one block...
First, sew one of the 2 1/2" contrasting side blocks A to each side
of the center 2 1/2" block A.
Press the seams toward the center block.
Following the sketch in the earlier photo,
match up the corner of one small triangle C
to the corner of the first B square.
Stitch all the way along one side of the triangle.
For part of the stitching, there will be only one layer of fabric,
since the triangle edge is longer.
Chain-piece all four of the small B squares in the same direction.
Press all of the seams away from the B squares, toward the C triangles.
Add the other small C triangles to the small B squares,
in the same way as before.
Chain-piece all four sections,
with the corners matched to the right angles of the triangles.
Press the seams away from the B squares, toward the C triangles.
Clip away the excess fabric from the back.
Next, lay out the remaining pieces
in a modified 9-patch, so that they are positioned properly.
Sew the triangle sections to the large square A pieces,
to make 3 rows.
Press the seams in the top and bottom rows
toward the triangle sections,
and away from the center squares.
Now the seams will nest together, as you stitch together the 3 rows.
For the last step,
add the large D triangles to the four corners of the block.
Make sure the corner triangles are centered over the edges,
and stitch them into place.
Here's how it looks when they are sewn on.
Trim the excess fabric from the outside edges,
and press the block well.
Trim the finished block to 6 1/2" square.
Line up the 3 1/4" marks with the points of the 1" squares,
so that your block is symmetrical.
Looky there, at all of those perfect points!
Admire your beautiful block,
and make more!
Stop back soon to see what I made with my new blocks!
 Pin It
 Pin It


