February 13, 2013

Be My Valentine

Happy Valentine's Day, everyone!
How would you like to stitch up your own version of my
BE MY VALENTINE mug rug?
Etsy in my shop, called eamylove.
It's written in a tutorial style, with loads of step-by-step photos and tips!


I've had fun this month creating hearts
in anticipation of this lovely holiday,
and today I have a few more to share with you.

I love that ricrac
and all those little squares of pink and red and white.

I didn't have to go far to find some scraps
from my table runner and pillow
that were perfect for these mug rugs!

The trimmed pieces from the Herringbone Blocks
and leftover strips gave me a jumpstart,
 using these fabulous fabrics.


I'm not gonna lie...it took me a long while
to create a piece of patchwork made up of 
tiny little squares.

Then I did some cross-hatching
and cut a pretty heart shape from the quilted magic
that came from my sewing machine.

Here's where I veered away from the original...
I put my ricrac between the layers, to finish the edge.

{Love at first sight!}


Want to see the back?
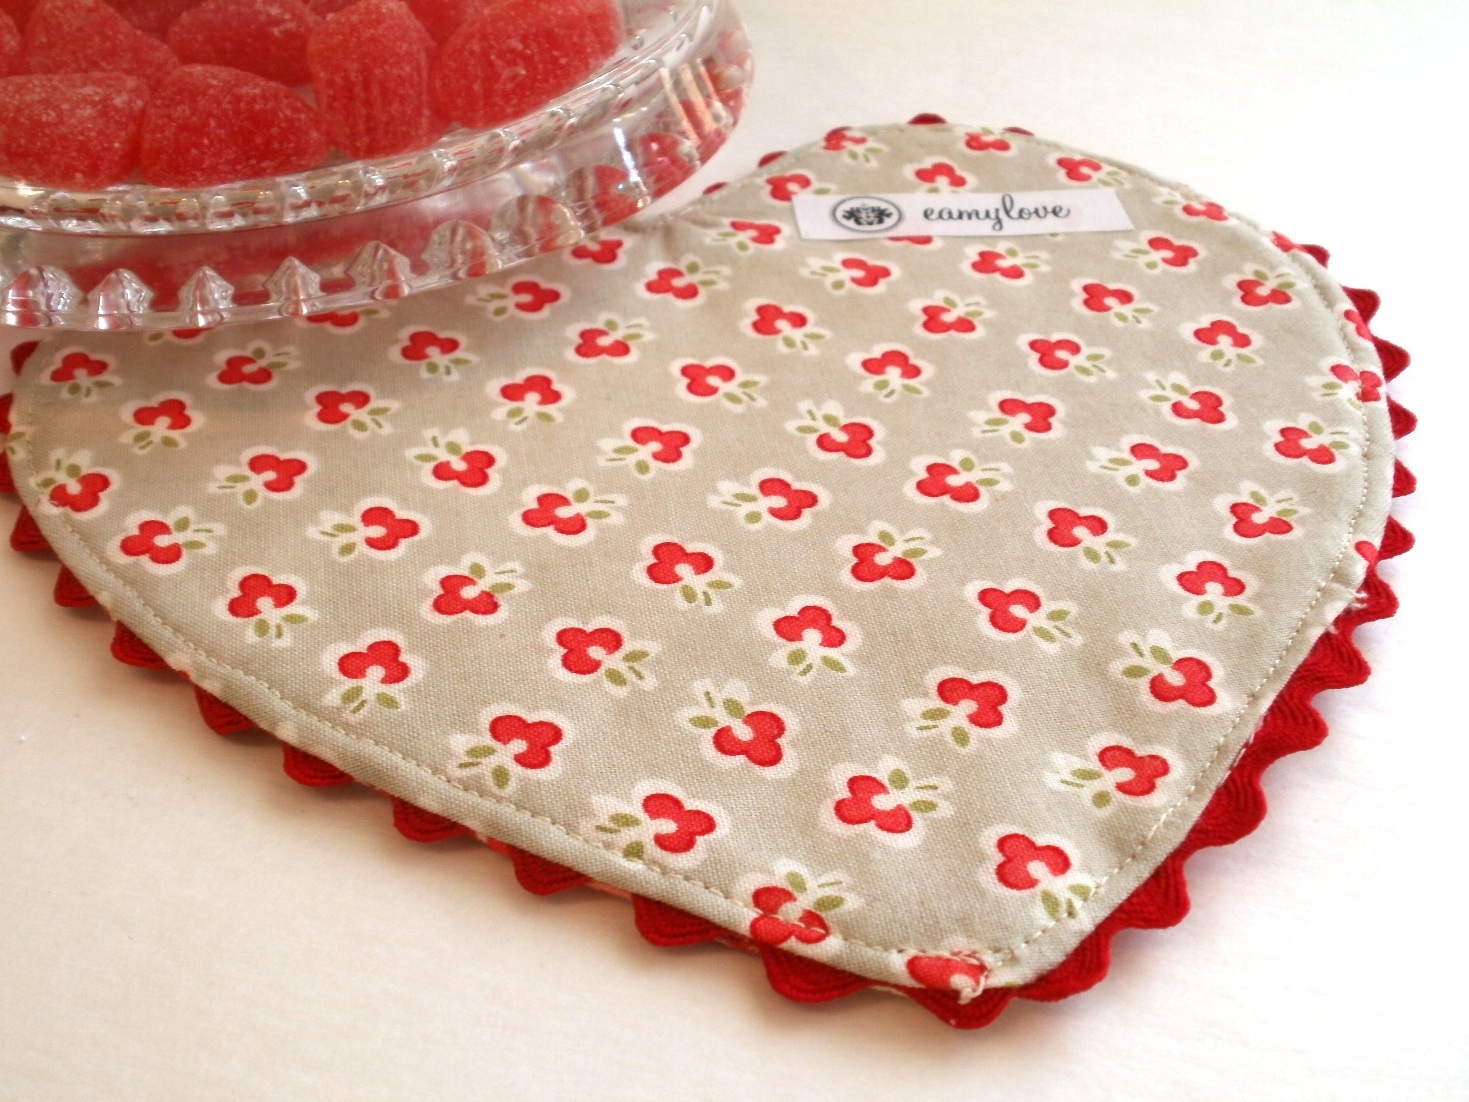

So sweet...and fun to make, actually.
I just had to make another one.

Instead of all the little squares,
I pieced a large patchwork from those 
herringbone block trimmings,
then cut my heart shape.

This time I did some stipple quilting.


I had enough left for a third mug rug, too,
quilted in square cross-hatching again.

I like the way it looks like a crazy quilt.


Here are the backs of the whole set.
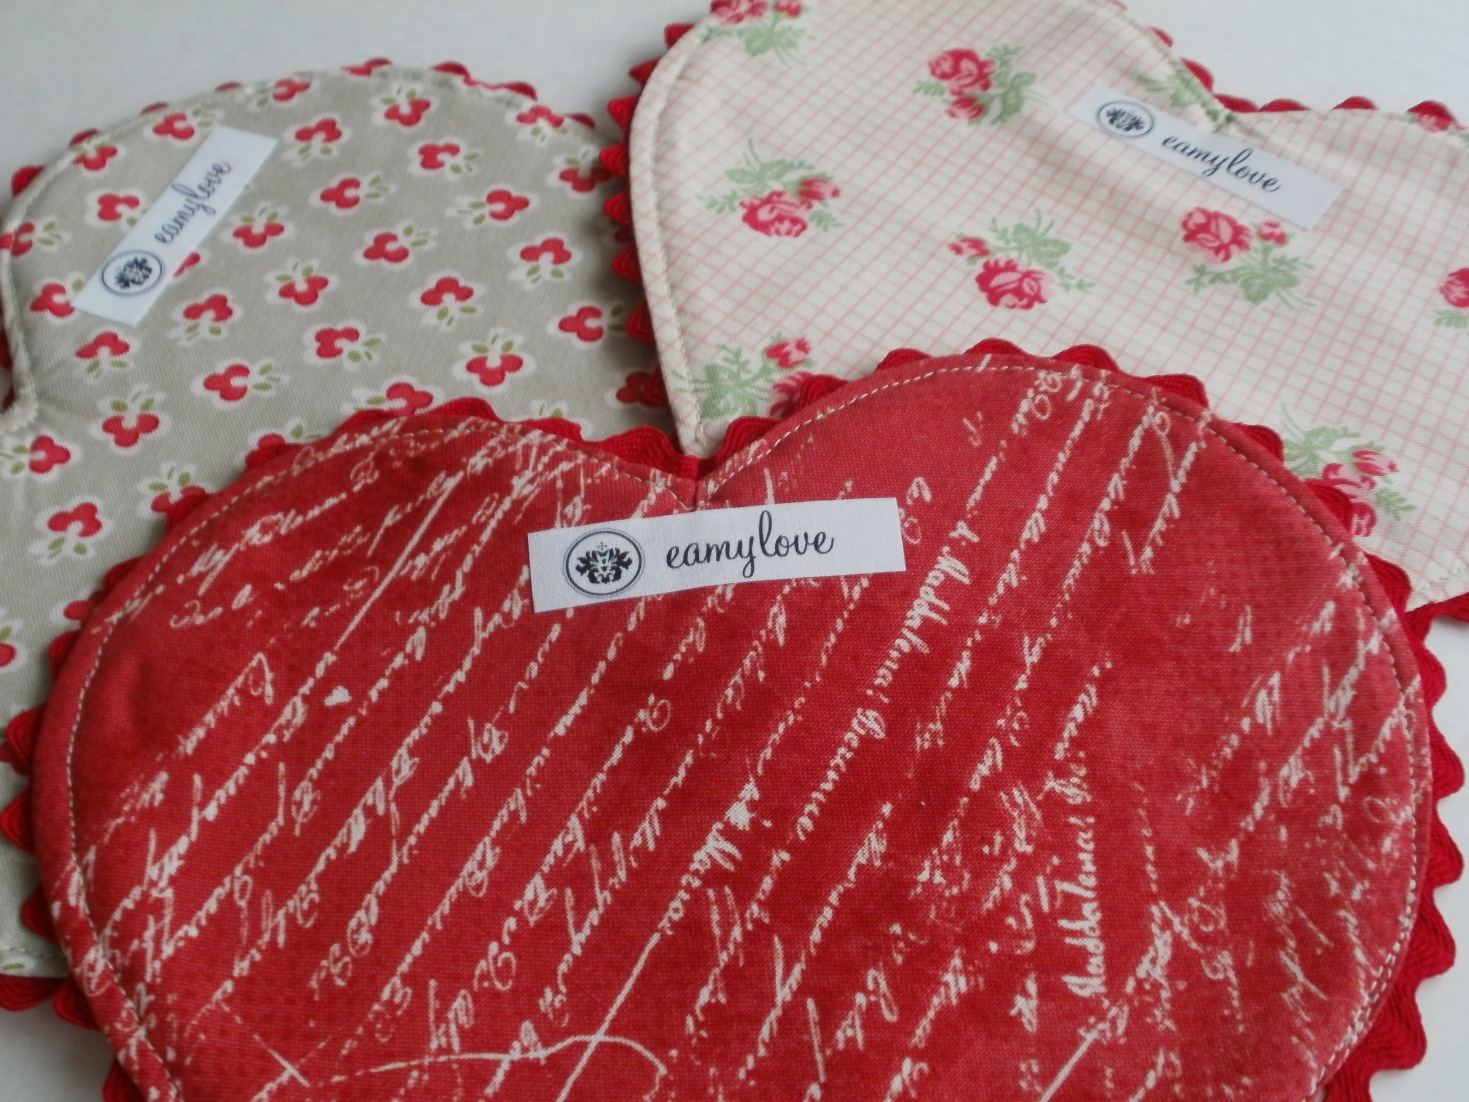

They look so pretty all together.


Each one is cute on its own, too!


I have such a great sense of accomplishment,
creating a few of these things that have
been in my mental Pinterest file
since before Pinterest came along!


I hope you'll enjoy
a very special St. Valentine's Day
with someone you love!


If you would like to make your own "Be My Valentine" mug rugs,
the pattern is available here on Craftsy, for only $2.99.
I'd love to see what you create!


Pin It

February 9, 2013

Love of Learning

Let's take a few minutes to enjoy a cup of tea
or coffee or cocoa
while we talk stitching!


Next month will mark a year since I began
my blog, but I've been sewing and quilting
much longer than one year.

On my blog I have opportunities to share
some things I've sewn recently,
and I like to fold in some "extras" now and then,
featuring projects that were made several years ago!

Today I'm showing a small wall hanging
I made when I took a class from Sue Nickels way back in 2007.
The course lasted two or three days, with the first day or two being spent
learning machine applique from the queen of applique herself.


I would describe Sue's signature style
as bright and energized, featuring saturated tones.
Check out the Beatles Quilt made by Sue and her sister Pat Holly,
and you will see what I mean.


For my class project, I used mostly soft pinks and greens,
pulling prints from my beloved 3 Sisters fabrics
including "Paris Flea Market" - the original release - and "Gingham Rose".

{I was really stretching my boundaries with the darker rose color!}

There were tonal prints, tiny florals, some paisley and even a woven plaid.
The ivory background is hard to see here, but it was a text print,
with subtle cursive writing in a pale tan.


When we learned to quilt the feathers, I was in heaven.  
I still enjoy making that design the most whenever I am machine quilting.

I remember so much of what I learned in the class,
and Sue is one of the best teachers I've ever met...
smart, vibrant, friendly and supportive.

{I bonded with her as soon as she took her shoe off for sewing!}


I chose to use invisible thread
for quilting, so that the texture mimics that of
hand-quilting, without interrupting the fabric design.


This is one of my most loved little quilts I've ever made.
It isn't exactly modern or trendy, but I love it dearly.
I would like to report that my husband chose
a place where my little quilt can be prominently displayed
all year round in our little house...but...not so much.

He lets me bring it out for Valentine's Day, though.
<3


It's such a funny thing...
just the other day I was reading Julie's blog, The Crafty Quilter
and she is beginning a new series about Applique.
She showed the Sue Nickels teaching project 
on her site, and I recognized it instantly.

I'll be checking out Julie's posts
to see what else I can learn in the world of applique!


Thanks for stopping by...come back soon!


Pin It

February 7, 2013

From the HEART

 Just in the nick of time,
I've created a pillow that's perfect for Valentine's Day!

{Or any other day of the year!}


 When I chose this month's theme...HEART...
I knew I wanted to make a quilted pillow for my project.


At the end of January I got involved with the Sew Can She
sew along, using the Herringbone Block tutorial from Bijou Lovely.

As soon as my first block was finished,
it gave me the idea to use it in the pillow!

{See what I mean?  It is kind of heart-shaped already.}


So I put this block aside until yesterday,
when I had some time for sewing. 
I pulled out my trusty machine applique friend...
Heat N Bond Lite.


I used the advanced heart-making skills 
I learned in elementary school quite a few years ago, 
and I cut out a big HEART template from a piece of paper, 
folded in half.  
I traced it onto the paper side of the Heat N Bond Lite
and cut it out, leaving about 1/2" on each side of the line.

Then I pressed the side with the exposed glue onto the BACK of my fabric,
centered to show off the pretty heart shape.

{Because I removed the center area of the Heat N Bond,
my heart was not overly stiffened.  Everyone loves a soft heart.}


Next  I cut out the heart on the line I'd drawn.


Easy peasy...here it is, with the paper backing removed,
all ready for stitching onto my square of creamy vanilla fabric.


I drive a Pfaff 2040 that is about 12 years old.

{I still love it.}

  It has an awesome blanket stitch that was the deal-maker for me 
when I was shopping for my sewing machine.


In no time, the center was finished.  
I chose two prints and made a mitered border.
I fused a piece of Pellon 987F fusible fleece to the back,
and it was ready for some quilting.

I stippled the entire center area.


For the borders,
I quilted straight lines, about 1/4" apart all the way around and around.
I love the crisp modern finish.


Now it was time to make the back...
and I used my very own free tutorial
for Pillow Backs with a Covered Zipper...a lovely finish, no?


The Pellon ShapeFlex 101SF fusible interface
keeps the back of my pillow smooth and strong.
I had no trouble stuffing a 20" pillow form inside,
for extra fullness and pudge!

{I wish you could squeeze this pillow for yourself.}


I just listed this pillow in my shop on Etsy, eamylove.
Hurry on over to see it, plus other projects I made
from the same fabrics.


Sending my LOVE for all of my friends Across The Pond
and on this same side...
with all my HEART!


Pin It

February 3, 2013

Cupid's Arrow Table Runner

I love a good sew along!
First I joined the Zakka Style sew along...


and then I started my own sew along,
along with The Patchsmith
and Susie's Sunroom.

{That was fun, using the same word...along...twice in a row!}


I just finished another sew along,
home of the fabulous free daily tutorial!


We made projects using the Herringbone Block,

I wanted to use this stack of 
pretty Valentine-y fabrics for my project,
which was a table runner.


I kept my first block aside and will use it for 
for the Across The Pond Sew Along.

{Soon, I hope!}


I made the rest of my half-blocks,
but did not stitch them together in pairs.
Instead, I used creamy white sashing strips between each half-block.


I alternated the directions of the chevrons,
to get a pretty zigzag effect for the table runner.


I followed the lines of the block, quilting every 1/2".


At the midpoint of the sashings,
I changed direction of the quilting,
which gave an awesome Arrow effect...
so I named my finished table runner
Cupid's Arrow.


I used more creamy white for the outer border,
and then I tried something new.
I finished it off with a scrappy binding.


I had lots of strips left over from cutting fabric for the blocks,
and this was a fun way to use them up!


I am totally enamored with this table runner.


The back is as pretty as the front, made
with the Giddy print by Sandy Gervais for Moda.


I used lots of other Moda prints, too...
from Vintage Modern, Oh Deer,Kissing Booth,
Sweet and Bliss.


Do you love it, too?


I have the Cupid's Arrow table runner up for sale 


Maybe you could drop a hint to your sweetheart
if you'd like it for Valentine's Day!

{Watch for more new goodies in my shop soon.}


Pin It

February 2, 2013

Across the Pond Update - February HEARTs

Have you been reading the blogs of my partners in inspiration?

has not only posted her own project
for her February HEART theme...
a pair of Valentine coasters...


but she is offering it as a FREE pattern!

Not to be outdone...
my sister Susie of Susie's Sunroom
has posted her own HEART project...
a Valentine snow globe mug rug!


Guess what?
She's made the templates into a FREE PDF
for your own enjoyment,
should you decide to make your own version.

If you know me "in person"
as well as "in blogland"
you may not be surprised to know 
that I'm at the end of the line in this footrace.

{Let's just say I was never on the track team.}


Some sew along members 
have already posted their own HEARTs
please feel free to add your own throughout the year!

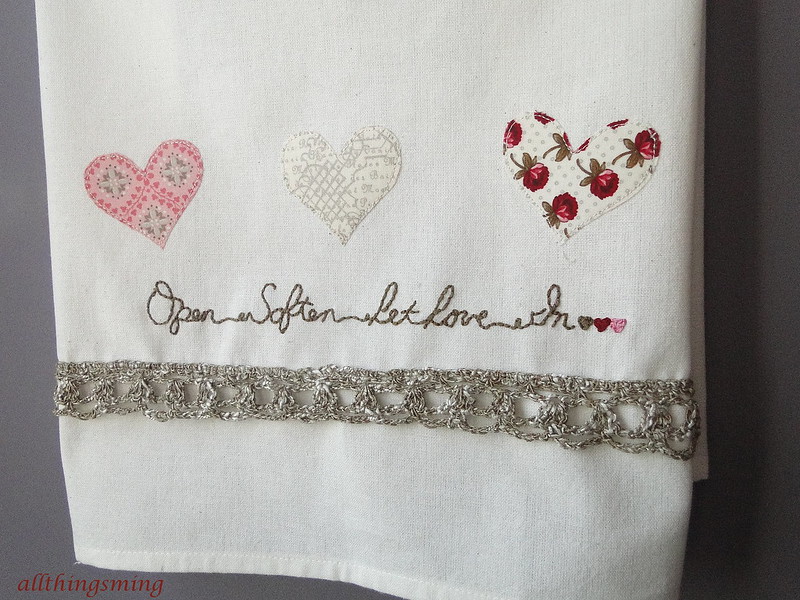
Here's a beautiful embellished tea towel

{It is so pretty that I had to put it on my Pinterest board!}

It's only Feb. 2,
and I've got a lot of excuses  stuff happening...
so my HEART project has not yet been finished.


I started it, though,
while I was in the middle of making another project,


These are the fabrics I used...
can you tell I {heart} Moda?
I'll share the final project with you very very soon.

{No more teasing...I promise!}


Pin It