Welcome to another chapter in the
Zakka Style Sew Along!
{If you are new to the sew along,
you can find out more at LRStitched.}
This week's project is contributed by
who designed the Ruby Star lines for Kokka.
{I have one precious piece of Ruby Star Rising, which I fussy-cut in this mug rug.}

I've spent a lot of time with the Zakka Style book,
in preparation for each of the many projects
I've created.
I've observed that there is a greater chance
of success and fun when I wait
for some of my sewing sisters,
like Amanda the Patchsmith,
to blaze the trail for me,
warning of the pitfalls that one could encounter.
{Personally, I think Amanda's ribbon turned out very pretty...
even if it requires its own vacuum cleaner.}

Admittedly there were some raggedy issues...
but I really wanted to make this patchwork ribbon!
Pretty soon, Lindsay reported a few innovative quilters who
found some alternate techniques to get around the
raw edge problems.
used pieced strips cut on the bias, and then stitched
the long edges together,
minimizing the loose thread problems.
{Looking great, Linda!}

OK...I told myself, "I've got this!"
I found some long strips of Aster Manor prints
in rich,warm red and brown tones.
I decided not to leave my edges unfinished...
first I pieced my 2 1/4" strips together,
on the bias, as I would piece binding.
I connected both ends, creating a tube.
Then I folded the tube in half, right sides together,
and stitched along one of the long edges.
I opened it up and pressed under the
remaining raw edges, with right sides out.
I stitched near the edges, the whole way around my ribbon.
{I am not a fan of turning tubes right side out!}

It was pretty, alright... pretty boring!
I felt that it needed a little something,
but I didn't have any vintage scraps of lace or ribbon handy.
In Lindsay's latest update on the project, she referred
the faint of heart not only to Linda's example,
but also to Simone's finished ribbon.
{Go and see! Simone details her process for making this sweet version!}

I was consumed with affection for the stamped words
on this beautiful bit of inspiration.
It reminded me of the Zakka Pincushion project from Week #3.
I really liked the way Debbie from A Quilter's Table
used a stamp to make a darling little spool of thread
on a linen scrap, for her pincushion, pictured below.
{I didn't have the stuff to stamp fabric with then, and I still don't have it now.}

Somehow or another, I wound up working out a fun little swap
with Debbie, and she actually sent me her little stamped ribbons!
{Here is Debbie's photo of the little linen ribbons. Can you blame me for wanting them?}

And that's when I had my Aha! moment.
I would use those little stamped spools and houses to decorate
my finished patchwork ribbon!
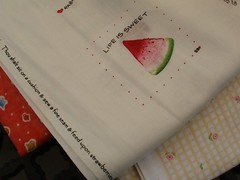
I used some Heat N Bond to cut out little squares from the stamped tape,
and also a few motifs from my panel by Susan Branch,
shown here.
Here's what happened...

And also...

Pretty soon, I fell in love with my own version!

I used a couple of scraps from my Winter Dresden quilt, too!
{Hopefully I'll be sharing a new post about the finished quilt before long.}

It finally felt "finished" now!

Whoever gets this ribbon on her package this Christmas
will have to sign a contract,
stating that she will not ever throw it away!
;)
Pin It


