Showing posts with label pellon. Show all posts

October 17, 2013

Skinny Pinny for October Across The Pond Sew Along

The Skinny Pincushion is this month's
and I was really grateful to Susie of Susie's Sunroom
for picking something that is so quick to make,
fun to create, and useful!


{The free tutorial can be found here from Green Bee Designs.}

These are Susie's skinny pinnies!  Photo from Susie's Sunroom
Want to see mine?
I was tempted to use the Panoramic setting
on my camera, to capture it in its entirety.

I'll just show you some close-ups, in stages, instead.

I started out with a favorite Lakehouse button print. 


 For the main body, I used the text print
from Sweetwater's "Mama Said Sew" line.
I was "saving" this sewing print for something special,
and it does make a killer pincushion!


All the way down at the other end,
I used the red and black ricrac from
the same Mama Said Sew line.


Here it is, all in one photo!


When I made my skinny pinny,
I pieced together the fabrics for the top,
to measure about 3" x 15".
I cut a piece of the button print for the bottom
that also measured 3" x 15".
I fused some Pellon ShapeFlex SF101 interfacing
to the wrong sides of the top and bottom,
for some support.

I stitched the pieces wrong-sides-together,
leaving about a 5" opening in the center of the long side 
that would become the top of the pincushion.
My finished pinny is about 2 1/2" x 14 1/2".

Here's a trick I always use when I have to leave
an opening for turning and/or stuffing:
I stitch from the edge of the project,
straight over to the start of the seam, backstitching,
on each side of the opening.

{It's easier to show you than it is to describe it.}


Here's another tip:
after turning the pincushion right sides out,
I always give it a really good pressing,
to smooth it before stuffing.

{Now's the time to add a cute label, too, if you've got one.}


Susie and many other pincushion aficionados
swear by crushed walnut shells,
for stuffing their pinnies.
I'm allergic to walnuts myself,
so I just used plenty of polyfil to plump up mine...
just a bit.

{It's still skinny!}


Once it was stuffed, I hand-stitched the opening closed.
Now you know why I chose to make my opening
at the top of the pincushion,
where it will rarely be seen.

;)


Just for a bit of jazz, 
I added a piece of black ricrac to my skinny pinny.
I just pinned it between the top and bottom layers,
along a seam, before I stitched them together.
The ricrac is actually not stitched down,
except at the seams.
I'm hoping to find a nice new pair of scissors
that can be slipped under the ricrac when I'm not using them.


I've already enjoyed using
this little gem, and it's loaded up with many more pins
than I've shown in this photo.


From both sides of The Pond,
we hope you'll share photos
in our Flickr group, if you find  few minutes to make
your own Skinny Pincushion!


Pin It

April 25, 2013

Christmas in April

Back in January,
I made a commitment to myself to sew
at least one Christmas-y item each month.

As it turns out, I wasn't the only one 
who had this great idea!
Julie, The Crafty Quilter, really has her act together,


And now I'm linking up with Christmas Through The Year
at Lily Patch Quilts, too!
Head on over there for even more ideas and a linky party.

I wondered whether I would have trouble
with motivation when warmer weather arrived
and the trees were budding.


As it turns out,
while I was stitching away on my new
I felt...downright festive!


I had made this pillow once before,
using my must-have-in-the-house-at-all-times
Pellon 987F Fusible Fleece.


For this new version,
I had a jumpstart, since
I had already cut out my snowflake design...


and chosen my Cherry Christmas fabrics.


I did a bit of stitching here...


and some quilting there...


and pretty soon I was ready to make the back of the pillow.


I used my very own tutorial for a


I was grateful for the good tips I'd written down,
because it's been a little while since I made a pillow.


My house is going to look so merry this Christmas!


Stay tuned...now that I'm pillow-happy,
I'm going to finish off my Copenhagen Pillow!

{It's about time, right?}


Pin It
January 16, 2013

Christmas Once A Month - January


Here we are in the MIDDLE of January already.
Christmas will be here again before I know it!

{My little snow friend here...created by my sweet friend Janet...
reminds me there is plenty of wintertime left.}


But THIS time, I'm going to be ready.
I'm joining Julie at The Crafty Quilter,
 who is celebrating Christmas Once A Month!


Internally I had already made the decision to try
to sew something Christmas-y
each month this year.

My plan is to keep Christmas fun
and not overwhelming, yet to make lots of handmade
projects for myself and for others.

Last year, I felt a smidge too much pressure to finish
my Winter Dresden quilt in time for Christmas.


{Truthfully December is the hardest month for me to keep 
my dining room studio available for sewing.}

The Crafty Quilter is making it easy...
and Julie is starting off the year 
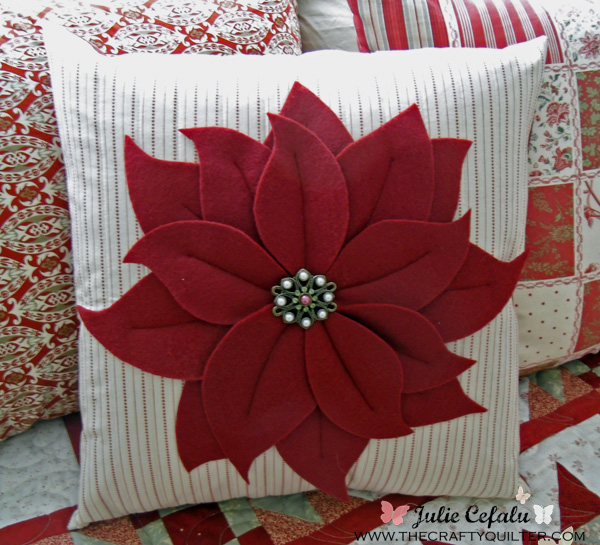
with a super-fantabulous Poinsettia Pillow!

{Is this not the most incredibly pretty flower there is?}

Photo from The Crafty Quilter
I definitely love that I have almost a whole year
to get one or two of these finished!

As I read the tutorial,
I was flabbergasted and flattered to learn
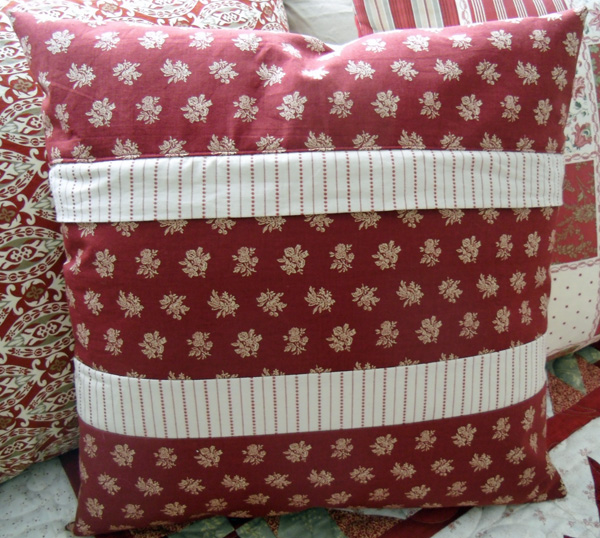
that Julie had used my free tutorial

Photo from The Crafty Quilter

This isn't the first time Julie has made my heart palpitate
with her interpretation of one of my tutorials.
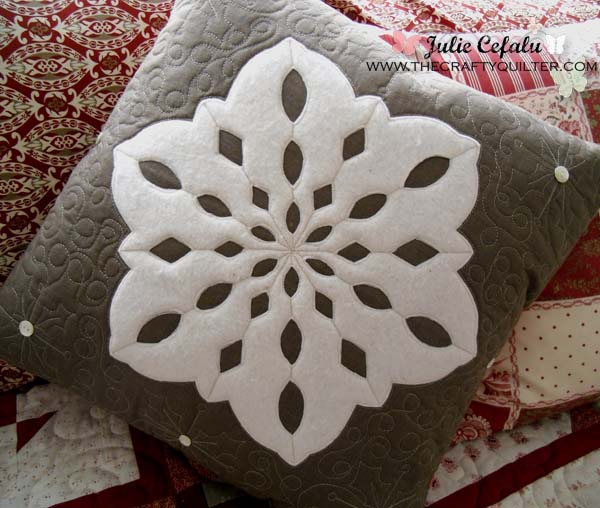
Have you seen her Paper Snowflake Pillow?

{Sigh...notice that beautiful quilting, the charming button detail and the soft colors.}

Photo from The Crafty Quilter

Coincidentally, another snowflake pillow has just entered my life!
A friend of mine from work approached me about
making something special from a quilt that had seen better days.
Since there were areas with bleach stains,
we decided some pillows would be a great idea.


The quilt was made by her husband's grandmother,
but that's all the detail I have.
I would have loved to have known this woman...
her quilt would qualify as Modern by today's standards.

The colors, now faded, are very "in" for today's decor...
the blue has become almost a steel gray.
The blanket stitches are made by hand, 
and it looks like she used a raw edge technique that is popular now.


The wavy quilting lines must have been so unusual
for its time.


To make this quilt into a pillow, I simply cut two large squares,
centering a snowflake in each.
I stitched the blocks together,
right sides facing, and left an opening for turning.
After inserting a pillow form, I handstitched the opening shut.


OK...is it cheating to say that this is a Christmas project,
even if it could be used all winter?

{That's one great thing about using snow as a Christmas theme.}


I still have time to make some more quick items for next Christmas,
so hopefully I'll be sharing more later on this month.
I think we're off to  a great start!
I hope you'll join us!

Pin It

November 27, 2012

Paper Snowflake Pillow - a New Free Project


This morning at our house we had a few snow flurries...
nothing major, just decorative.
:)
I just love how each snowflake is unique, 
and also very beautiful.

{Here's how they look under a microscope...photo from interestingtopics.net}


 A few weeks ago,
snowflakes inspired me to create a pillow,
and the free pattern is now available for
you to download

{Go to pellonprojects.com and choose Projects, then the Home Decor tab, to find my Paper Snowflake Pillow project.  It's free to join the site, and then you can download the PDF file.}


I may have mentioned before how much I love using Pellon 987F fusible fleece
in so many of my projects.
I literally buy it by the bolt!


The brilliant idea I came up with was to use Pellon 987F Fusible Fleece
on the OUTSIDE of the pillow,
as the main design element!


Maybe you had been waiting patiently to see the front of this pillow.


{I featured the back for my own free tutorial for making 


So now you can make your own
Paper Snowflake pillows!

I chose some aqua and red prints for my original pillow.
I love the contrast of the top fabric...both are from Joy by Kate Spain...
perfect for the background of the snowflake.

{The bottom fabric is awesome, too...will be used for a future pillow!}


Then I used some Ta Dots in Ocean by Michael Miller.

{Raise your hand if that shocks you.  Anyone???}


And for the backing, I love the snowmen from Ann Kelle's latest Christmas line, called Jingle, for Robert Kaufman.


I'm actually working on my second paper snowflake pillow right now!
I've got some Cherry Christmas for that one, by Aneela Hoey for Moda.

{I'm going to have to get a bigger Aneela Hoey box!}


I don't provide a template for the snowflake design, because...


That's the idea...no two are going to be alike!


But I promise...they will all be very pretty.


See what I mean?


I kinda went crazy with the quilting on my first one.
I liked the way it looked on the back, too...all squishy and soft!


A Snowflake Pillow can be used all winter, 
but a Christmas snow is always extra-magical.


Maybe you could partner up with a child you love,
to design and cut out the snowflake shapes.


If you do make one, or a flurry of Paper Snowflake Pillows,
I'd love to see them on my Flickr group page,


Pin It