Have you joined yet?
The Zakka 2.0 Sew Along has begun!
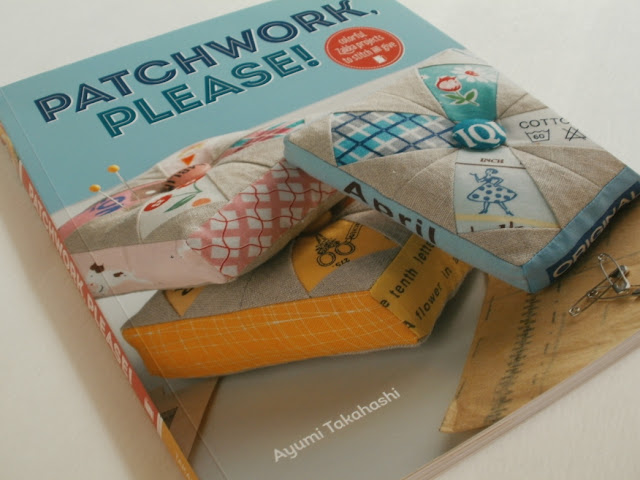
All you need is a copy of Patchwork Please! by Ayumi Takahashi
and a desire to have fun, sewing cool projects!
I know, I know, I know...
I need another sew along like I need another yard of fabric.
I need another sew along like I need another yard of fabric.
{Well, not like that. I legitimately always need another yard of fabric.}
since I have met so many amazing bloggers through the original
Zakka Style Sew Along!
Let's get going, with week #1's project:
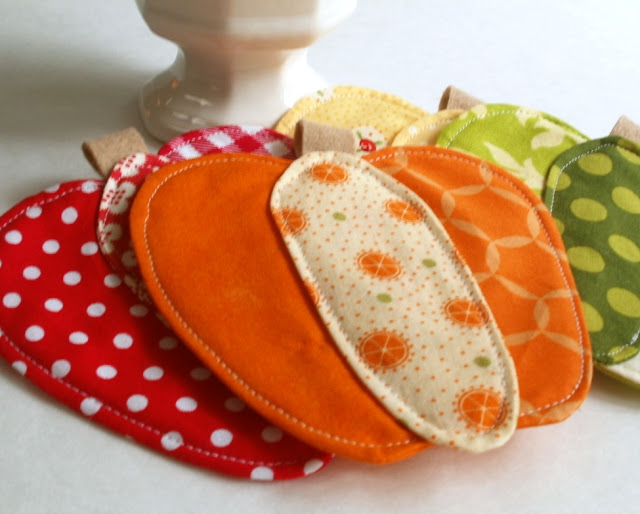
Bell Pepper Coasters!
I am delighted to report that this project is quick and easy.
That didn't stop me from messing up the first pepper I made.
I forgot to put the batting inside, before I stitched the front and back
pieces together!!!
{It kind of looks more like an apple at this point...I think I'll do something with it later. Watch for it!}
Anyway, I got it right the next try.
Look how cute the back looks, too!
{BTW...I used fusible fleece instead of regular batting. No shifting or bunching while I stitched the layers together.}
Then I got smart, and made the other 3 coasters
all at the same time, assembly line style.
I cut all of my scrap pieces out,
and I used freezer paper to create my templates.
That way I could just stitch along the edges of the templates,
instead of drawing the patterns on the fabric.
I trimmed very near the edge,
and it was easy to press the pieces flat.
Here is a great tip to use, whenever you are leaving openings for turning:
In addition to backstitching at the starting and stopping points,
sew a few stitches from the seamline to the edge of the fabric.
{Backstitch those stitches, too.}
I used that tip to make a minor adjustment to the pepper instructions.
The pattern says to sew a seam to connect two of the prints,
then use a seam ripper to partially open the seam.
Instead, I just left part of the seam open, for turning later.
I enjoyed making a whole set of four coasters, one from each color:
red, orange, yellow and green.
I'm going to sum up my "likes" and "dislikes"
for each project I complete for the sew along:
Dislikes are first...
*I had some trouble understanding the very first step
of the instructions, possibly
because I didn't know what the goal was.
Once I realized that this technique was similar to one
used by Eleanor Burns, for applique,
I could picture what was supposed to happen.
A diagram would have been very helpful here.
{This comment may reappear in subsequent posts.}
*This is not truly a dislike,
but I found it easier to just make simple curves
for the templates. The detailed lines in the pattern
were too fine to show up once the pieces were sewn and pressed.
And the likes...
*This project was perfect for small scraps!
In fact, I adjusted my cutting measurements
to be just a bit larger than the templates.
It's fun to use favorite bits of fabrics in small projects like this.
*I spent almost no time making the last three coasters.
As soon as I understood the process,
they practically made themselves.
*They are just as cute on the back as on the front,
if you ask me!
*The best like of all the "likes"...
if you head over to Penny's post at Sew Take A Hike,
she has easy directions to convert this project into
the most awesome matching hotpad!!!
I got busy and put my own hotpad together in no time.
It's just like a mommy to my little baby green coaster.
And the back shows a nice view of some Heather Bailey fabric.
I'm a bit worried that some of the other projects
in the book will be much more involved.
At the pace of one project per week,
I'll just be joining in whenever it suits me.
{I'm so glad it suits me this week.}
No pressure.
Won't you join, too?
 Pin It


Awesome! Very smart pants I would say. Great tips Amy, thank you for sharing!
ReplyDeleteThese are so cute! I appreciate the tips and I think I'll pencil them in right now. I love using freezer paper too and I find that using pinking shears to trim around my stitching helps ease the curves better when turning right side out.
ReplyDeleteJulie @ The Crafty Quilter
Really beautiful! I will try the freezer paper, too!
ReplyDeleteThanks for the tips!
Susie
These are so delicious.
ReplyDeleteI love your coasters and hotpad (and Heather Bailey fabric.) I am happy to sew along with you again :)Thanks for sharing your tips!
ReplyDeleteSew pretty
ReplyDeleteSo cute and clever! Thanks...
ReplyDeleteAdorable!! and some of the fabric looks familiar and way gone! I don't know how you keep up with all the quilt alongs! I am having a go at it this summer ; )
ReplyDeleteAwesome projects - thanks for sharing the nitty gritty!
ReplyDeleteAmy, I loved your sewing around the freezer paper idea and shared it on my blog with a link to yours.
ReplyDeleteLinda F.
I LOVE your coasters, Amy!! Like you, I doubt that I'll be able to join every week due to the nature of the project, so I'll be joining when I can too. But the first week was quite fun! Thank you for all the tidbits. :)
ReplyDeleteReally cute..i got the book a while back but haven't got a chance to check it out yet. really adorable coasters. I am going to ask a really simple question...freezer paper, i haven't used it much in sewing , it looks like it was adhered to the fabric ??? if so how?
ReplyDeletethanks ,
Donna
ps I really like the likes and dislikes ...very informative.
Love your coasters, gorgeous fabrics and colours. Love reading your tips and likes and dislikes too.
ReplyDeleteI used temporary spray adhesive to stick my templates to the fabric. Made the process so easy! Great fabric choices.
ReplyDeleteThis comment has been removed by the author.
ReplyDeleteI forgot to say how great they all are..... & I made Freezer paper templates too... that way you can see if it will fit on a scrap of fabric.... Charm squares work well.- you don't need the fabric as large as the instructions....
ReplyDeleteI'm planning on joining in when it suits me, too, and when I'm healthy enough (just got a pneumonia diagnosis). This one wasn't for me, though I do love how your project turned out. A project a week is way too much for me. Thanks for the tip on turning. I'll try that!
ReplyDelete