There goes February!
The way time is flying in 2013,
I'm especially glad I've committed to making
at least one Christmas-y project
every month, along with Julie at The Crafty Quilter.
{Ahem...yesterday was the next-to-the-last day of the month, but that counts!}
 g
g
There's another benefit to this promise I've made myself.
I've had this pattern for Mini Stockings by Fig Tree Quilts,
almost since the moment it was released in fall of 2011.
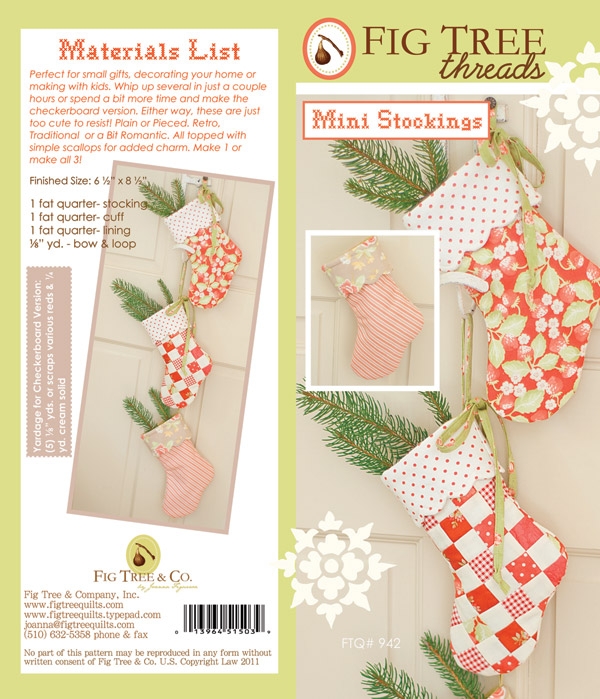 |
| Photo from Fig Tree Quilts website |
I've read it over and over,
because I enjoy pattern reading...
don't judge...but I've never actually made any stockings before now.
All of a sudden I now have 3 of them finished...so far!

I have amassed a pretty good stash of Cherry Christmas
fabrics by Aneela Hoey for Moda.
I pulled out my beloved fat-eighth bundle and some yardage.

The pattern calls for fat quarters of fabric for the little stockings.
I'm happy to report that fat eighths can be used instead,
with the important exception of the directional prints
in the body of the stocking.
{Save the directional prints for the cuff, if you don't have yardage.}
{Save the directional prints for the cuff, if you don't have yardage.}

I'd like to show you what I made, review the pattern,
and point out a couple of tips I came up with in the process.
This was the first one I created...
I think the shaping of this stocking is absolutely perfect!
{I've checked out dozens of stockings, and this is "the one" for me!
It's just right, with respect to proportions and angle of the foot...
oh, yes, I care! And it's small and CUTE.}

I plan to make some more of these cuties,
using the patchwork pieced method described in the pattern.
Being that it was the end of the month, though,
using single fabrics for the stocking pieces
using single fabrics for the stocking pieces
made this a really quick and easy project.
{I'm saving the little scraps to stitch together into some patchwork...good idea, right?}
This pattern uses my BFF PFF...
that is, Pellon Fusible Fleece 987F.
I couldn't find any reference in the pattern
instructing which layer of fabric to line with the fleece.
I assumed it was the outer print, not the lining,
and it worked beautifully that way.
I just went ahead and fused the outer pieces as soon as I cut them.
I just went ahead and fused the outer pieces as soon as I cut them.

I increased the cutting dimension for the height of the rectangles
that are cut to make the scalloped cuff, by about 3/4"
that are cut to make the scalloped cuff, by about 3/4"
to allow more room for the seam allowances,
and to make the cuff just a wee bit larger.
{You can see the slight difference it made here.}

The method for sewing the scalloped edges
was the most exciting and innovative step of this project
for me, and I was thrilled with the outcome!
I trimmed each of them to about 1/8".
This allowed me to achieve nice smooth curves,
not only in the body of the stocking,
but also the tiny scalloped cuff edging.

Additionally, when I stitched the linings,
I purposely used a generous 1/4" seam,
so they would nest inside the stocking neatly.
I used a ton of steam to really flatten the finished stockings.

I left my stockings plain...for now...
and did not make the tie and loop for hanging them.
I want some flexibility on how to use them.
They would be so pretty on a place setting,
for instance.
Closer to Christmas I will most likely
find a way to jazz them up a bit,
maybe with a little garnish of buttons or wool felt holly leaves.
For now I just love looking at them all fresh and smooth.
{Oh, and there's my little label inside the darling finished stockings.}

I can't say enough about how much I adore this pattern.
I was afraid I wouldn't be able to make them
as pretty as the ones on the pattern cover,
but I am so pleased with the results.
I think they are just delightful,
and I can't wait to plump them up
by filling them with little goodies this Christmas!
 Pin It
These are adorable! I want to make some! I'm curious about where you got your labels?
ReplyDeleteI should do a post about the little labels someday. I always get mine from a shop on Etsy called Bitsy Creations. They have premade designs available or will work with you to create something unique. I love them, and the shopkeepers are so sweet and helpful!
DeleteThese are perfect and perfectly adorabe and cute! Well done - they look amazing!
ReplyDeleteI absolutely LOVE these stockings, Amy! Beautiful work! And thanks for all the information. It's great!
ReplyDeleteAmy, Adorable! Is that a regular size dinner plate they're laying on? Your scallops are amazing.
ReplyDeleteAmy, Adorable! Is that a regular size dinner plate they're laying on? Your scallops are amazing.
ReplyDeleteThat plate is actually a cake pedestal that I found at Walmart, from the Better Homes & Gardens line. If you visit my blog often, you'll recognize it from my Winter quilt postings, when I used it to display my blocks in progress. I love that cake stand - it makes anything look yummy!
DeletePrecious and angelic!! You have created some little treasures!!
ReplyDeleteI will be looking up that pattern.
And referring to your helpful hints!
Your photography is stunning with this project!
Susie
Congratulations on another Christmas project finished! Your stockings are so cute and the scallops are just the perfect addition to pop them up to adorable status. I might even have that pattern somewhere... Thanks for the inspiration!
ReplyDeleteI love that idea of a Christmas project a month. The stockings are beautiful!
ReplyDeleteThe stockings would be fabulous on plates on the dinner table with a matching napkin sticking out of them. Thanks for sharing ... they are adorable!
ReplyDeleteI also own and love this pattern, but haven't made any little stockings yet. But you've inspired me to get going. I plan to make some in fabrics with small herb prints for our Maumee Valley Herb Society holiday sale, as well. You did a beautiful job on your stockings, and I appreciate all the little tips. Thanks!
ReplyDeleteThese are so cute! I love the fabrics. And as usual, your workmanship is impeccable!
ReplyDelete