December 29, 2013

Tea Time - A Thoughtful Mug Rug

Hello, friends!
I hope everyone had a very Merry Christmas!
I enjoyed seeing our family and friends
and celebrating this most wonderful holiday
with all of the special foods and music!

{With a dining room table filled with gift wrap and cookies,
I took a self-imposed hiatus from my sewing machine,
but I hope to be back in business any minute.}

Remember when I was making my
using Susan Branch illustrations and phrases,
from a fabric panel?


I've still got quite a stack of sweet sentiments left,
and I've used one of them to make
this charming little mug rug,
just right for tea time.

{I loved the colors from my Rainy Day pinnie, so I used that palette.}


Here you can read the lovely quote by Louisa May Alcott...


This was a simple patchwork design...
I just framed the quotation in lots of my favorite prints.


Many of them happen to be from the Bake Sale line...


since I've been having so much Quilty Fun lately!


I added lots and lots of straight-line quilting this time.

{Those lines are only about 1/4" or so apart.}


The quilting really shows up on the back side.  Great texture, huh?


As usual, I have fusible fleece inside the layers.
It makes for a nice flat mug rug...
so my mug won't tip over.


I wish I could invite each of you to join me
for a nice cup of tea...


But that's what blogs are for, right?
Come back often, and stay for a while!


I've made sew many wonderful friends through blogging and sewing,
and I wish each of you, near and far,
a very Happy New Year ahead,
filled with good health and good stitching!
Pin It

December 4, 2013

Handmade Holidays from All Year Long - 2013

I really really really love Christmas...
especially the handmade decorations
and cookies that go along with it.

Last December I finally acknowledged to myself
that the month of December
is probably the month when I actually sew the least!
No wonder, since I do my sewing in the dining room.

That's why I decided to try to make at least one
Christmas-y handmade / handsewn item
every month, during 2013.

Would you like to see a review of my year
of handmade holiday stitching?

a Snowflake pillow made from a vintage quilt.


Mini Christmas stockings from the Fig Tree Quilts pattern.


March...
a Cherry Christmas table runner from the Cotton Way Candy pattern.


April...
a Paper Snowflake Pillow from my own tutorial.


May...
a Divided Basket from the Noodlehead pattern.


June...
Some Christmas gift tags using a tutorial by Nana Company.


July...
First, a Topiary Tree Pillow from my own free tutorial...


August...
Christmas Pinwheel mug rugs.


a Christmas mug rug from The Patchsmith's Ticker Tape pattern.


the Comfort and Joy mug rug of my own design.


November...
was a big finish for me. The Holly Jolly Tree Skirt
really put me in the Christmas spirit.

{I need to make another one for myself!}


and now it's December!

{Will I actually make something this month?  Stay tuned...}
Pin It

December 2, 2013

Sewing Baskets for Quilty Fun

I'm having a blast with the Quilty Fun sew along!
This week we're making Sewing Basket blocks.


These were sew easy to put together...
I think I spent less than an hour making mine.

I kind of named my blocks to myself, based on the fabrics...
this one is Bake Sale.


Then there's my Flower Sugar basket.


And finally the Vintage Modern one.


I used my Angler 2 tool to make this project so easy.
It saves a lot of marking
and adds more accuracy to my stitching.


Once I was done sewing the baskets,
I had a little stack of triangular trimmings
that just seemed a bit too big to throw away.


I decided to draw a line about 1/4" away from
the trimmed edge, at a 45 degree angle.

I stitched all of the little pairs together...


then pressed them open and trimmed them
to exactly 1 1/4" squares.

{I wonder what I'm going to do with these?}


I think I'll try to make more of those teeny little
half-square triangles, whenever I'm trimming
more blocks for the Quilty Fun projects,
and see what I can make from them later.

While I was photographing my blocks,
I discovered WHAT FUN it is to use Instagram!!!


I'm always a little bit late to the party,
but if you'd like to follow me,
my Instagram name is eamylove.

Hope to see you there!


Pin It

December 1, 2013

Mug Hugs - Across the Pond

For the December edition
Amanda The Patchsmith has come up
with a trendy new accessory...
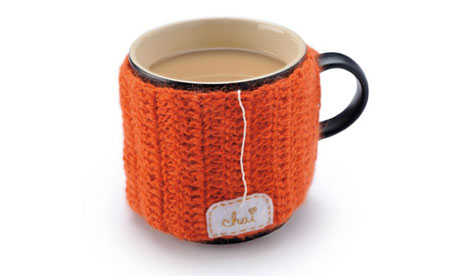
the MUG HUG!

{No, it's not a typo...that's what she calls them. She's so clever!}


Photo by The Patchsmith
That's just ONE of the mug hugs Amanda
has made...a little fox,
using this free pattern by Crafty Staci,
with a brand-new Patchsmith mug rug pattern to match.

{This pattern also includes a super sweet bonus coaster!}


Photo by The Patchsmith
Susie has joined in over at Susie's Sunroom,
showing some darling mug hugs of her own.
The Patchsmith made The Fox, and Susie made The Hound!


Photo from Susie's Sunroom blog
I'm a bit behind schedule in making up any
new mug hugs, but I made this one a while ago,
using a paper sleeve as my template.


This type of mug hug works best on a disposable cup,
as it is tapered in shape.

I used a pretty button as a fastener.
These mug rugs are a great way to use up
one-of-a-kind favorite buttons!


Even though my red mug is straight-sided,
the Christmas mug hug looks pretty cute,
in my humble opinion!


It's time to get out those Christmas mug rugs
and give those hot chocolate mugs a nice hug!


If you'd like to join in the fun this month,
here are some more fun patterns, tutorials
and inspirational photos...
they should get you started!

I think the first time I ever saw a mug hug was in
an issue of Mollie Makes magazine.
Some were knitted and others were crocheted,
so there was something for everyone.

{Instructions are included here.}


Photo from Mollie Makes Magazine
Look at this adorable snowman
mug hug,
with instructions on the Red Heart Yarn blog!


Photo by Red Heart Yarn

At Embroidery Library Projects blog,
you can find full instructions
for making an embroidered coffee cozy.
Plain or fancy, these are really pretty!

{Susie made TWO of these...sort of...stop over to see!}

Photo from Emboidery Library Projects blog
Over at SewMuch2Luv,
you will find instructions for making this
{lovely} mug hug, with...RIC RAC!

{Now, why didn't I think of that?!?!?!?!}


Photo from SewMuch2Luv blog
That ought to get everybody started!
If you make some mug hugs,
please share photos in the Flickr group!


Pin It

November 27, 2013

Have A Holly Jolly Tree Skirt!

It's the end of November,
and I no longer feel even the least bit funny about
stitching up something Christmas-y every month!

This month I finished a bigger project...


Here's Andy's pattern cover,
featuring a Christmas tree and everything.

{My tree is NOT up yet.}


For my version,
I used fabrics from Kate Spain's In From The Cold collection.
I chose 6 prints for the front of the tree skirt.

{Little Ginger photo-bombed me, under the table.}


At the end of the day,
I had my tree skirt top all pieced together.
Here it is, spray-basted and ready for quilting.


After another day,
I had the tree skirt all quilted,
and the binding was even finished.


On the back, and for the binding,
I used a red and white snowflake print
from the same fabric line.

{I'm so glad I have some yardage left over to make something for myself.}


I really love that cookie print,
reminding me of family cookies from Christmases past.


And these cocoa cups look like the ones my great-grandma
used in her restaurant...in my mind's eye, anyway.

{OK...her cups were solid white with green stripes,
but they were the same shape as these cups.}


The little label on the back will remind Val that I made this,
just for her.


It was easier than I expected to attach the binding
to all of the angles of the giant hexagon.


I chose to make ties from the binding fabric,
but you could use ribbon, too, as the pattern suggested.


Have a Holly Jolly Christmas!
Stop by soon for a wrap-up of my
Christmas projects from 2013.


Pin It