Showing posts with label bunny hill scrappy plate club. Show all posts

December 18, 2012

Big Finish - Winter Dresden Quilt

If you've stopped by my blog before,
or followed me on Pinterest...


or Flickr...


you may have caught a glimpse of my
Winter Dresden quilt in progress.

way back in January.

{Uh-Oh...I think I was supposed to have a finished quilt by...March 2012.}


I had the wisdom and foresight to make mine a Christmas-y/winter quilt,
so I set a goal that was more my speed...
to finish it in time for Christmas.

{I did it!}

This quilt was soooo enjoyable to make from the free pattern by Bunny Hill.
I had the most fun stitching the Dresden plates,
and I've got a couple of extras for making some matching pillows.

But for now,the quilt is just right for snuggling on the couch
with my little dog, Ginger.


I've had a few questions about how I quilted mine.
I use my regular sewing machine - a Pfaff 2040
that I've had for about 12 years.

I use spray basting to hold my quilt sandwich in place.
I almost never start quilting the same day as I spray,
and I don't have issues with the needle getting sticky.

I use the time-honored "fluff and stuff" technique.
I just focus on quilting the area under the needle,
not worrying about all the rest of it.

The first step is to stitch stabilizing lines,
in the ditch, with matching neutral thread...
along every border and sashing line
vertically and horizontally.


That leaves the blocks and the borders ready for
more creative free motion quilting designs.
I switch to invisible thread at this point,
so I don't interrupt my favorite fabric prints.

I made a petal design on the blades of the Dresden plates.
Then I stippled the centers and around each plate for every block.


{It didn't take that long, and I love how it looks on the back.}


For the skinny border, I just made a wavy line.


For the corners and the centers of the outer borders,
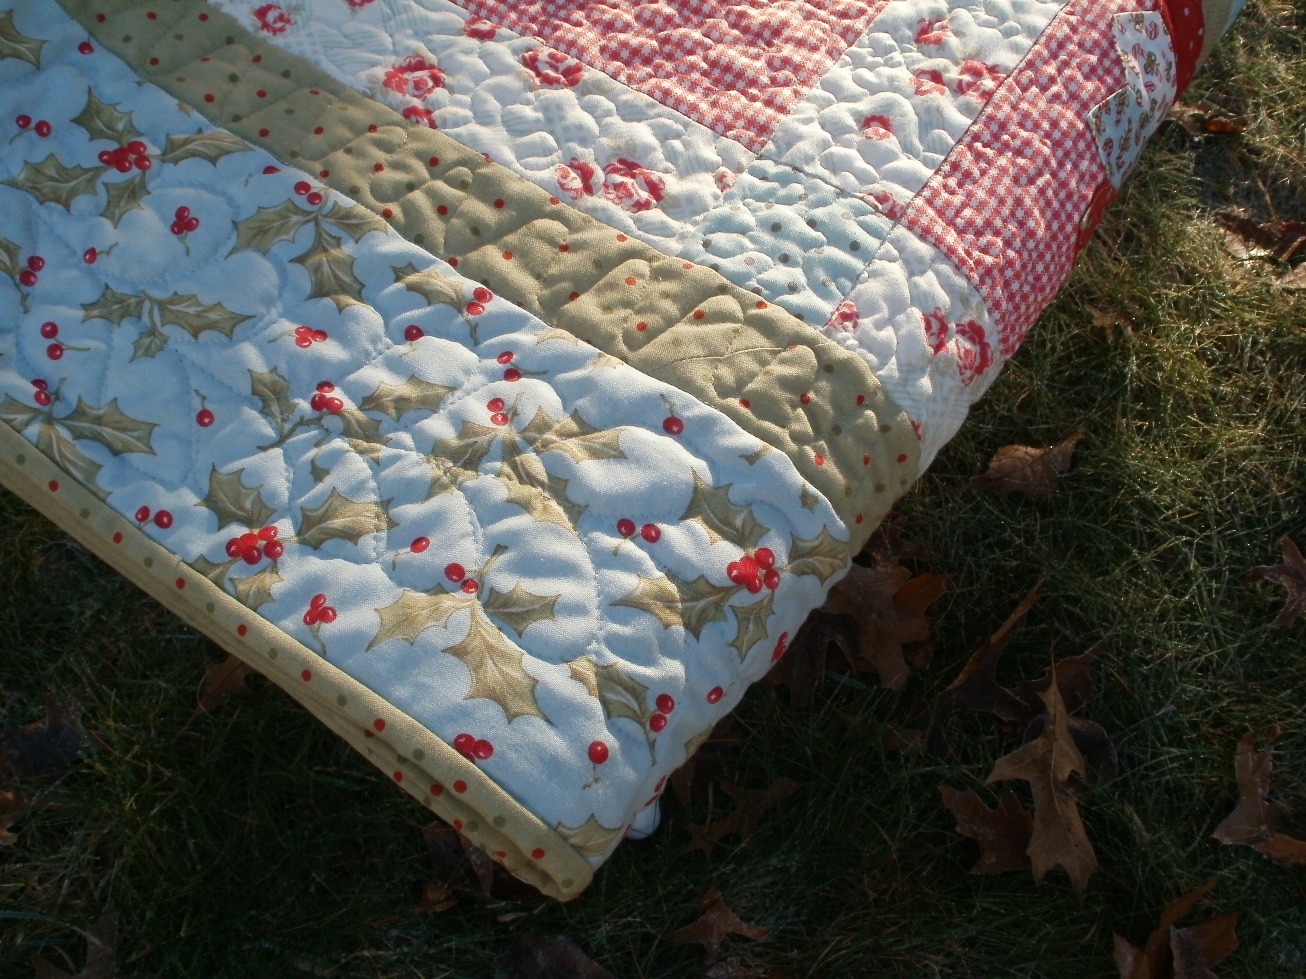
I drew a holly design, then traced it onto some Golden Threads paper.
I made 8 layers of the paper and stitched the design
on the whole stack at once,
with only the needle...no thread...to mark the pattern.

{See the holes making the design on the left?}


Then I laid the paper with the design on top of the quilt and stitched away.  
When I was done, I patiently picked the paper off.

{Yeah...right.  I had some tweezers, which helped.}


It doesn't show up a lot, but it's my favorite part.
Here is a view of the back.


To finish the border, I added my OTHER favorite part...
lots of free-form feathers.


{The Scrappy Plate Club pattern used scalloped edges,
but I kept mine straight instead, since this is a lap quilt.}

I like the binding print, which matches the skinny border.


I am just delighted with my new quilt, and the fond memories of 2012.


Pin It

May 8, 2012

Zakka Style Itty Bitty Quilt Block Magnets

Are you still sewing along with Zakka Style?
I am...can't believe I'm keeping up
with this pace, but it's so much fun!

{Come along with us...details are at LRStitched!}


This week I made something that I'm keeping
for myself!

{All of my other Zakka Style projects have been listed for sale in my shop on Etsy, eamylove.}


They really ARE Itty Bitty Quilt Block Magnets! 
They finish at only 1 1/2" square!

This chapter's contributor is Nova Flitter,
who blogs at acuppaandacatchup.com.
Go and say hello to her lovely posts!

Adrienne of Little Bluebell  - another beautiful blog - 
has her own version posted this week for the Sew Along.
She has some great tips for this project!

{I'm going to give you my tips, too!}


One of the coolest things about this project is 
that you barely need any linen at all.  
Here is the scrap I used.  
I actually had enough to make all 6 magnets from this little bit!

{I actually considered...briefly...throwing this irregular bit away!  OMGosh!!!}


I cut all my linen pieces out first.
I used my favorite...100% European linen in Oatmeal.

{CONFESSION:  I cut my pieces for the triangles a tiny bit larger than the directions, 
rounding up to the nearest 1/4".  
That allowed me to cut the HST's to the perfect size when I squared them up.}


Next I cut all of my prints...
I kept them organized, in little stacks,
one for each block.

{I used coordinates from my Winter Dresden Quilts project...still a WIP, but coming along.
The gingham is from Strawberry Fields by Fig Tree Quilts.  The floral is from Martinique by 3 Sisters, and on the back I used one of my Winter scraps from Minick and Simpson for Moda.}


The BEST tip from both Nova and Adrienne was to shorten the stitch length.
It made it so much easier to stitch without the wee blocks shooting through my sewing machine.  

I squared up my pieces everytime I could...
BEFORE finishing each block, and AFTER.

{I LOVE this tiny block!}


Here they are, all done.
They were actually pretty perfect!
I was having fun now!!!

{They are not quite flat in this photo.}


You know me...I use Pellon 987F Fusible Fleece by the bolt.
I diverged a bit from the instructions and used that, instead of regular batting.
I thought the blocks looked very sweet the way they were, 
so I did not do the quilting, as the book suggested.

{I can't believe I'm admitting this...I thought about leaving this block out, 
because I didn't feel like  printing out a paper-piecing template.  
Turns out you don't need one!
And this one is now my very favorite one of all.
And it was THE MOST FUN to stitch!}


When it was time to turn the teeny blocks
right side out, I was sooooo glad I'd used the fusible fleece!
It helped to hold my little stitches in place
during this stressful process.

I used Darice Super Strong Ceramic Magnets
inside my blocks.  I found them at a local crafts store.

{I listened to the good advice to make sure the magnets were positioned correctly, 
so they would stick to the refrigerator!}


I love them so much...

{They are as sweet as a dessert!}


Go ahead...try them!

{But these ones are mine!}


Pin It

March 31, 2012

Winter Dresden Plate Quilt

Spring has sprung,
 but I still have some Winter designs in my quilting thoughts.


I joined the fun with the Bunny Hill Scrappy Plates Club, 
starting in January.
This is my first time sewing along with a project like this, 
and I'm having great time!

{If you haven't discovered Anne Sutton of Bunny Hill, you're in for a treat!}

The project makes great use of Darlene Zimmerman's EZ Dresden Ruler, which I found for a great price here.


I knew I had one already, 
but I couldn't find it until AFTER I had ordered a new one. 
 {A glimpse into my "real world"...sigh.}
But that's okay, because I also ordered another new template, 
which will be featured someday in another post.

January began with a burst of activity.  
We gathered up our "scrappy" fabrics and cut dozens of blades for the plates.  I chose to use my layer cake of Winter by Minick and Simpson from Moda.


I sliced and sorted my blades...each plate needs 20 blades, 
and there are 12 plates in the quilt.  


I made some extras, because I want to make a couple of pillows, too!


{I even had a wee bit of extra layer cake fabric left, 
so this is a great choice of precut to use for this project.}

Here are chains of blades, stitched at the ends.


They were all pressed into the pointed wedge shape...


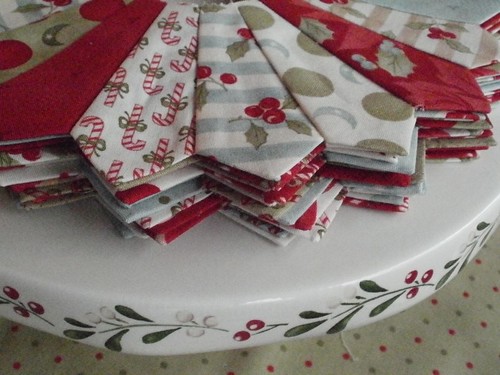
Here they are, stacked on my winter cake pedestal.  


Yummy, huh?


But we weren't finished yet!  The blades were stitched together in groups of 20, and pressed into beautiful "plates."


Now they really looked good enough to eat!


For February, the plates were appliqued onto the background squares.  Hmmm...since Winter is now out of print and hard to find, I chose a red gingham from Strawberry Fields by Fig Tree Quilts from Moda.
I ran short and needed to buy a bit more, just for that last block.
{AFTER that, I found one more yard of the gingham in my stash.  A theme emerges...}
But that's okay...I have so many big plans for that red gingham!

I straight-stitched my plates to the background...


Then I used HeatNBond to fuse my center circles in place.  
I used my machine to blanket-stitch the centers.
  

{My favorite stitch!}


Ready for the next step...uh-oh!  Today is March 31st, and I have not done the March step.  And I have to be at work by 2:30 p.m. today.


 Not to worry...
the Bunny Hill Scrappy Plate Club gals are very sweet, 
and they won't mind if I catch up later!

In fact, why don't you join us now, if you haven't already?
Catch some more inspiration at our Flickr group!


Pin It