Showing posts with label patchwork please. Show all posts

February 28, 2014

Skinny Pinnie - Received!

We are closing out our 
By now, everyone should be mailing
and receiving their finished pinnies.

As the "swap mama" I had the luxury
of choosing my partner,
and I selected the lovely and talented
Beverly, of golfingbev on Flickr.

Look what came in the mail for me,
courtesy of Beverly!


There is so much goodness in here,
starring the most adorable...
and petite...skinny pinnie,
composed of teeny tiny hexagons!


See that needle book in the background?
It's made to match the pinnie,
that I must try someday soon.

{Sigh...}

{Photo by golfingbev on Flickr}
There are little treasures I'd never seen before,
such as Japanese zippers...
with French sayings...


Or little cherry zip pulls!
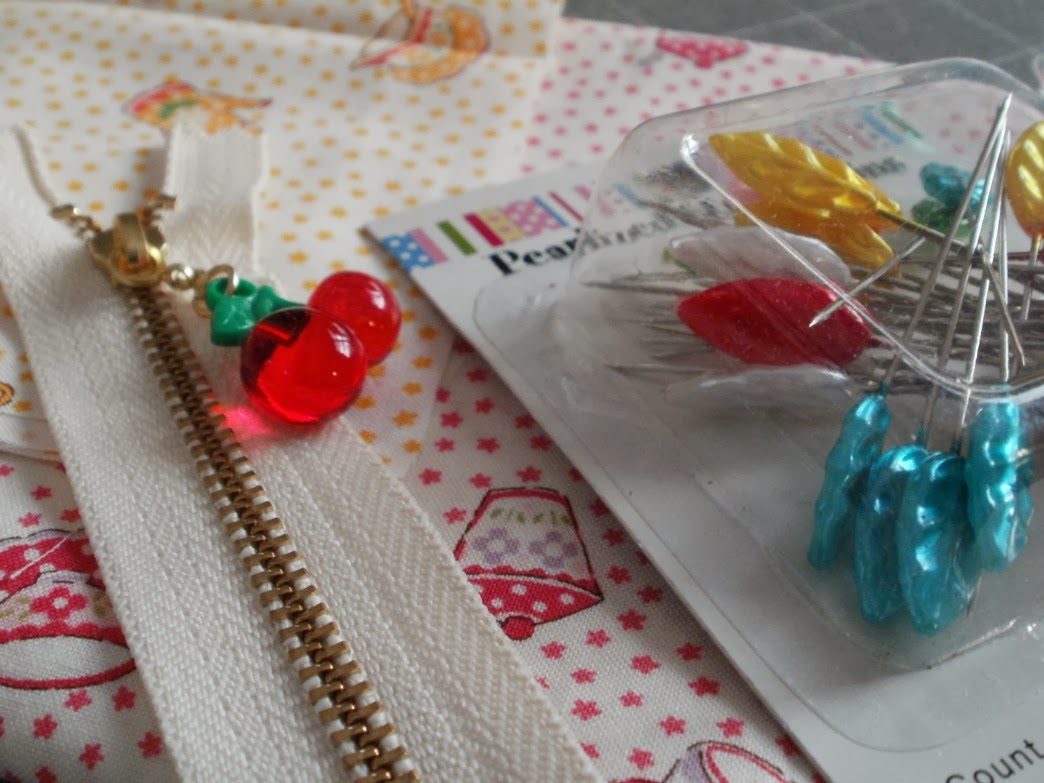


There are Japanese sewing and crafting goodies galore
in this little stack of sweetness.
I love each one to bits!

{Everything was all bundled up with bits of Washi tape!}


There was something old...vintage feedsacks!


And something new...this handy Seam-Fix
seam ripper with a little thing on top
for picking up the snips of thread.

{Of course I may never need to try that tool, since I'm such a perfect stitcher. Ahem...}


There are more fabric samples, too...
little teapot prints I had admired on Bev's Flickr site...


and even a Glamping mini charm pack!

{Can you find it, among all of the treasures?}


And look at this darling little tag!


I first noticed Beverly's sewing talents
during the Zakka Along 2.0 Patchwork, Please sew along.
Beverly has a distinctive style,
mixing bits of fabric to create detailed treasures
that leave me breathless.

Check out her photostream, and you will see what I mean!

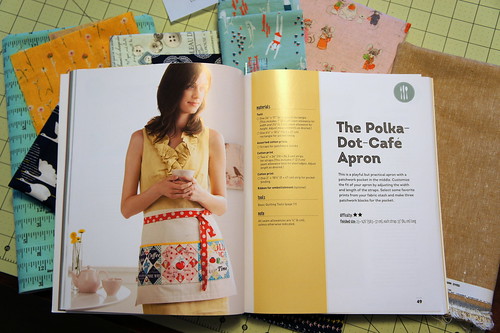
Beverly's Patchwork Please Apron - Polka Dot Cafe
Thank you, Beverly, for spoiling me rotten!

{I will be able to trace my new Japanese sewing fixation to this magic moment.}


Pin It

October 9, 2013

Prettified Pincushion

This week marks the grand finale
of the Patchwork Please Zakka 2.0 Sew Along.
Debbie from A Quilter's Table
has done a magnificent job of
hosting the last half of the sew along!


They say you can't judge a book by its cover,
but as soon as I saw those Prettified Pincushions
on the front of the book,
I knew I wanted to have a copy!

For my version,
I chose lots of sunny yellow prints
from my fabric stash.
I used linen, to mimic the samples in the book.


There is just something about the texture
of the linen, paired with
smooth quilting cottons...so touchable.


The neutral linen also serves
as a calming backdrop,
enhancing the brightness of the yellows...
so exciting!


I made my pincushion quite a while ago,
but I remembered to make some notes about
my progress,
for my "likes" and "dislikes" section.

Dislikes are always first...
If you haven't made your {first}
prettified pincushion already,
make sure you add a 1/2" for the seam allowance
{1/4" on each side}
to your template piece!!!

{This is just sooooo important. The finished pieced block will be 2 1/2" square.} 

The instructions don't say when to remove
the paper from the block.
I recommend waiting until all of the 4 blocks
have been stitched together.

One more criticism I have is regarding the 
size recommendations for the scraps
used in the paper piecing.
I am stone serious when I say that
I wrote in my journal,
"You will CRY, unless you cut the pieces LARGER
than the book recommends!"

I used pieces at least this size:
4 Prints: 2 1/2" x 3"
Background Linen:  (4) 1 1/4" x 2"
(4) 2 1/2" x 2 1/2"
(8) 1 3/4" x 2 3/4"

And now for my "likes"...

I really enjoy paper-piecing once in a while,
and this was really a rewarding project
to make with that technique.
I think it would be a great project
to make, even if you've never tried it before.

Another great thing about making this project
is that you end up with a
very functional and stylish item.
The size is just right,
and it is the perfect way to explain
what is meant by "zakka".


My greatest "like" is the finished result.
I mean...just look at how CUTE it is!
The covered button adds so much charm!

{And I'm not just talking about MINE...I haven't seen one I didn't love,
as they have popped up all over the internet and blogland.}

If you've got this book,
I guarantee you will be happy
with the pincushion you prettify
from this design.


 I think I'm going to have to prettify some more pincushions!
Pin It

August 21, 2013

Patchwork Please - Happy Hexagon Trivet

Thank goodness I've got Bloglovin'...
otherwise I may not have realized that
this week's Patchwork, Please Zakka 2.0 Sew Along
is all about the Happy Hexagon Trivet!

This sweet project was one of my must-makes,
from the first time I paged through my copy of the book.


I see that it is rated 2-stars on the difficulty scale.

There must only be 2 stars on that scale,
because I found this project to be
a lot more complicated than I expected.
I made the mistake of trying to blend
regular paper piecing and freezer paper template
techniques.

{Note to self:  Don't ever do that again!  Try just the normal paper piecing.}


That being said,
I'm super excited about the way
my new mug rug turned out.

I'm showing off one of the three Cath Kidston
mugs I purchased a few months ago.

{They are among my most loved possessions.}


Let's get to the "likes" and "dislikes" for the project...
dislikes are always first.

Right off the bat,
I was highly disappointed that the paper
piecing pattern requires enlarging.
Oh.My.I.Hate.That.Part.

In the end, the entire pattern still fit on a single page of paper.
Why couldn't the publishers have printed it at actual size???


I was going to bind my project as described in the book,
but my outer fabrics would have been nearly covered
by the thick binding.
That's most likely because I didn't remember
to cut the outer edges plenty large enough to allow
for a decent seam allowance.


That brings me to the Likes.
with a 1 1/2" single fold binding.
It worked pretty well, even on the angles.

{Like:  new skill acquired.  I had never bound a hexagon before.}


Also, I really like the size of this project.
There's plenty of room for a large mug and a snack.
Alternately, a little tea pot would fit perfectly on this trivet.


I also like the way it looks on the back...
just as cute as the front, really!


Most of all, though, the best Like for this project
is that it is such a beautiful design.
Ayumi's gifts are being shared all over blogland.
Her version is exquisite,
and I love every variation I've seen so far, being made by others.

I love cherries in the kitchen,
and this project was great for using
a variety of cherry prints and polka dots I've been collecting.


Maybe time will help me to forget
all of the labor pains I withstood,
to end up with my lovely mug rug.
A nice cup of tea will also work wonders!
Pin It

July 25, 2013

Template-Free Polka-Dot-Cafe Block

I made a promise, and I'm keeping it!
Today I'm sharing how to make a 
template-free, no-fuss, perfectly-pointed block
from the Polka-Dot-Cafe Apron project
featured in Patchwork, Please! by Ayumi Takahashi.

Photo Credit:  Cut to Pieces blog
The apron was one of the projects that I loved most,
when I first paged through the book.
That block design is just so adorable!


But, alas...I felt more than a little bit inadequate
when my lovely blocks were stitched together.
As careful as I was, my points disappeared into the seams
when I trimmed the blocks and stitched them together.
I was not alone...almost everyone else in the Zakka 2.0 sew along
expressed some degree of frustration, too.


I vowed to try again someday, to figure out a better way.
Recently I decided to draft the block,
using some "round" numbers and see if I could have better luck.

These are the "finished" measurements I used to draft my block, so I added 1/2" to each element.
 The final block is 6 1/2" square.
It worked!
I'm pleased to show you my method,
if you'd like to make this design, too, without templates.

Fabric Selection:

For my blocks, I used (1) center block A
and (4) contrasting block A pieces surrounding the center.

I used another fabric for all (4) of the small B blocks.

For the remaining triangle pieces, C and D,
I used the same fabric throughout.

Here's how my first trial block turned out,
made in Christmas prints for "Christmas In July".


Cutting Measurements:
NOTE:  I added 1/2" to each of the elements of the block
A  (5) 2 1/2" squares - the center square is of a different print
B (4) 1 1/2" squares
C (4) 2 1/4" squares, cut diagonally to make 8 triangles
D (2) 3" squares, cut diagonally to make 4 triangles for corners

I found it easier...and prettier...to cut out
the pieces for several blocks.


Let's get started with the sewing process for one block...

First, sew one of the 2 1/2" contrasting side blocks A to each side
of the center 2 1/2" block A.

Press the seams toward the center block.


Following the sketch in the earlier photo,
match up the corner of one small triangle C 
to the corner of the first B square.
Stitch all the way along one side of the triangle.
For part of the stitching, there will be only one layer of fabric,
since the triangle edge is longer.

Chain-piece all four of the small B squares in the same direction.


Press all of the seams away from the B squares, toward the C triangles.


Add the other small C triangles to the small B squares,
 in the same way as before.


Chain-piece all four sections, 
with the corners matched to the right angles of the triangles.


Press the seams away from the B squares, toward the C triangles.
Clip away the excess fabric from the back.


Next, lay out the remaining pieces
in a modified 9-patch, so that they are positioned properly.


Sew the triangle sections to the large square A pieces,
to make 3 rows.
Press the seams in the top and bottom rows
toward the triangle sections,
and away from the center squares.

Now the seams will nest together, as you stitch together the 3 rows.


For the last step,
add the large D triangles to the four corners of the block.

Make sure the corner triangles are centered over the edges,
and stitch them into place.


Here's how it looks when they are sewn on.
Trim the excess fabric from the outside edges,
and press the block well.


Trim the finished block to 6 1/2" square.
Line up the 3 1/4" marks with the points of the 1" squares,
so that your block is symmetrical.


Looky there, at all of those perfect points!
Admire your beautiful block,
and make more!


Stop back soon to see what I made with my new blocks!

Pin It

June 27, 2013

Polka Dot Cafe Apron - Zakka 2.0 Week #4

What's cookin' at your house?
Here at mine,
I've whipped up a little Polka Dot Cafe apron,


Grab a tall glass of sweet tea,
and get ready for a lot of pictures of my version of
the Polka Dot Cafe Apron.

In my humble opinion,
I used some of the cutest fabrics on earth,
from Lori Holts' Bake Sale for Riley Blake.


I decided to use the same print for the center squares on each block.


I love the way they look with my

{Do you see those tiny little spatulas on the green and blue block?}


Shall we "dish" about my likes and dislikes?
Dislikes are always first...

Okay...I haven't seen this mentioned
in anyone else's posts,
but the cutting instructions say to cut 4 of the 
large squares.

Um...there are 5.  The one in the center
is a different print, but the same size
as the four squares around it.


As much as I have joined in the lament that
this book lacks diagrams,
I found this project's piecing diagram to be very confusing.
The instructions said "Sew
in the order shown...," and referred to the figure,
but there were 5 #1's in the diagram.

{I did figure it out, but only because I'm an experienced sewist.}


The templates...oh, I didn't use those.
I measured them in the book and kind of rounded them up a bit
to the nearest 1/4" figuring I could trim them to size.

{I believe she meant to advise using freezer paper for templates, but it didn't come out and say it like that in the description.  Again, it was confusing.}


Oh.My.Gosh.
When I was finished making my blocks,
I barely had anything to trim off, as shown below.
I did not have 1/4" to spare, to preserve any points!!!

{My 1/4" seam can't be THAT far off!  How on earth did the template users manage, I wonder?}


This is one of those projects that looked like
it was going to be quick and easy,
but it took me almost all day to complete.

Maybe it was just because I kept stopping to look at how cute it was!


This is really a time-saving tip, rather than a "dislike"...
I pressed my binding in the same way as I made the apron ties.  
Rather than attach the binding as described,
I stitched it on "taco-style" in just one step,
enclosing the raw edges.

{How about that darling text print?}


I also added a 1 1/2" sashing between the blocks,
so I didn't have to try to line up all those "missing points" I had.


And now for some more of the "likes"...
Obviously,
the blocks themselves are just sooooo sweet!
I love that they are retro-style and allow the fabrics to shine.


I also like that the patchwork pocket
fit just right onto my plain turquoise tea towel!
What a nice shortcut for me!


My most favorite detail is just about the best "like" ever for me!
The sample has a little piece of fabric tape tucked into the side of the pocket.
I didn't have any decorative tape to coordinate,
so I just made a little fussy cut tab.


Would you like to see it really close up???

{I knew you would!}


Someday, I hope to adjust the measurements
to re-create this adorable little block,
points and all.

{If I figure it out, I promise to share!}


Pin It