Showing posts with label Across the Pond. Show all posts

October 30, 2014

End of October - Across The Pond Sew Along Rag Wreath

This month's
featured a fun project...
rag wreaths!


My sister Susie  over at Susie's Sunroom
created a sweet wreath from a range of plum fabrics.
She added some button details.
Sigh...adorable!


Amanda The Patchsmith...
our British "sister"...styled her own
autumn wreath with flannel plaid,
accented with golds, oranges and reds.


When I saw those two projects, I made sure
I took the time to make a rag wreath of my own!
I pulled out a stack of homespun wovens
that have been in my stash for...
ahem...a very long time.

I followed the tutorial by Hiphome for my project,
and I cut my strips about 1 1/2" x 5" or so.
I wouldn't have wanted those strips any shorter,
because they would have been difficult to tie.

My mom and I had a wonderful afternoon
of crafting together, and she created her own
wreath to take home.


My finished wreath looks so full and pretty, 
hung on my front door.


OK...let's be real.
I had to take photos on the front door,
but my wreath will NOT be living there.
The first rainy night or snowy storm
would probably ruin my fluffy wreath.
It's an inside wreath!


I only took the outside photos
so you could see how lovely it is.
It doesn't show up well in my indoor pictures,
but that's where it will really be kept.

{I couldn't get any nice photos of Mom's wreath, but is gorgeous,
hanging in her hallway, against a taupe wall.}


From now through Thanksgiving,
I'll enjoy looking at this lovely textured
autumn palette...I wish you could touch this wreath!


I hope you'll try making one of your own.
If you do, please add it to the 

Come back tomorrow for
another October finish...as we finish October!


Pin It

September 1, 2014

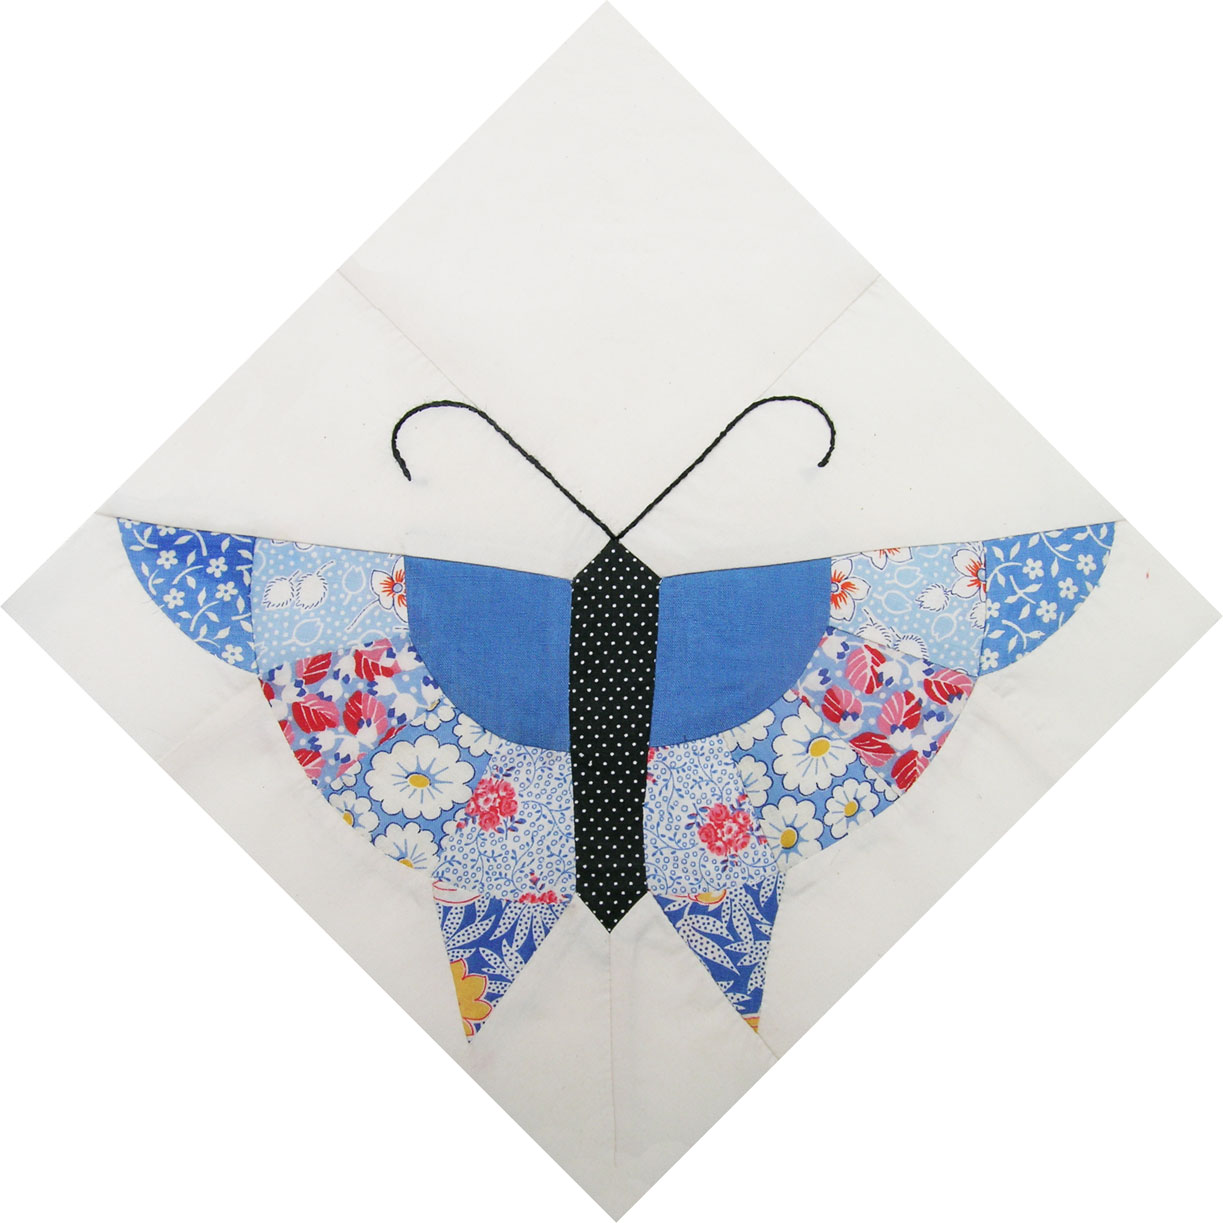
September Across The Pond - Butterflies!

I've been noticing a new trend
in fabric lines and crafts...
BUTTERFLIES!

Have you seen 'em?
They're featured in so many places
that quilters and sewists love to visit.

One place I love to visit is Susie's Sunroom,
and Susie has chosen a sweet butterfly project
for this month's Across The Pond Sew Along theme...
Origami Butterflies!

{You'll find the free instructions for the one below at Michelle Patterns.}


Look what Susie did...
her butterfly has landed on a pretty quilted basket!

{Stop by her blog to see another one that has metamorphosized into a bookmark!}


Not to be outdone,
has created her own stunning butterflies.


Inspired by these pretty, flighty, fluttery friends...
and by that, of course, I mean the butterflies...
I made my own version.

{So easy and quick...I made mine in 20 minutes, at 11 pm!}


Of course, I chose my favorite colors,
turquoise and lime.


I used some Color Me Retro fabric for the small print,
and paired with lime gingham from Darla by Tanya Whelan.


I stole the idea from was inspired by Amanda
to use some pretty ribbon
for a delicate pair of antennae.
That's my favorite detail on this sweet little project.


I'm not kidding when I say that you and a little child
in your life could make these
as a fun art project.
There is minimal stitching, very easy to do,
and the adult in the room could handle the ironing.
Children love origami!


If you are looking for more butterfly inspiration,
check out my Pinterest board,
as well as the links listed below.

Pictured here is Wingspan, one of the fabrics from
a new Bonnie Christine line
for Art Gallery, called Winged.


Next, from Frivolous Necessity, is a quilt that's been on my 
absolutely-must-make-that-someday list, 
from the moment I first saw it.
When I was a little girl, 
my dad made a real butterfly specimen collection
for a college course,
and it reminds me of that one.


Of course, butterflies have been
starring in quilt shows for years and years.
pieced into a beautiful example.


Some fabric butterflies can be no-sew,
as shown in this clever tutorial


That should get you started thinking
about butterflies.
If you've got the chance to create
butterfly projects of your own this month,
please feel free to share them


Pin It

August 7, 2014

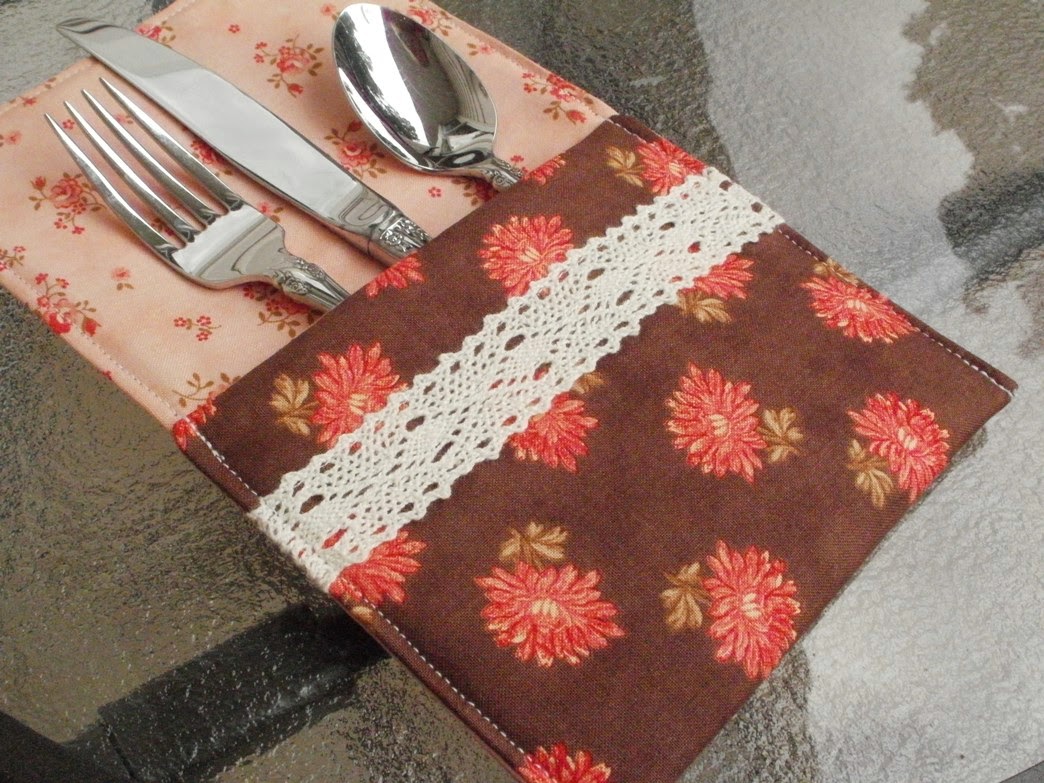
A Hexie Flatware Pouch for the Across The Pond Sew Along

I shared photos of some little hexagons
I made using a mini charm pack
of Glamping by Moda.


My mom was quite taken with the cute
little 1" hexies,
so I decided to use a few of them to make something for her.
But what should I make???

I turned to a comment by The Patchsmith
for inspiration.
In my post for this month's
Amanda suggested using a single cutlery pouch
for a breakfast tray or a Mother's Day present.

{Brilliant! No need to make an entire set!}


I made up a single one-of-a-kind pouch,
just as a special gift for my mom...
for no reason at all.


I chose three of the prettiest hexies,
and used white Kona cotton
as a glamorous backdrop.

I stitched around each hexie by machine.
So easy, actually!!!

{I shortened the stitch length to 2.0 on my sewing machine.}


For the lining of the flatware pouch,
I selected a piece of Sunshine Roses
by Tanya Whelan.
I love the aqua polka dots in the background.


This little flatware pouch
will brighten any day, don't you think?

Enjoy, Mom!


Pin It

March 8, 2014

N Is For Noodlehead - My Latest Divided Basket

Hello, Friends - 
I've just got time to check in for a quick post today!

I've got photos of my latest installment
in the series of Divided Baskets


For this version,
I used some of the orchid prints in
Heather Ross's Briar Rose line.

{Here is the back view of the basket...}


This pretty basket is a gift
to welcome a lovely new baby girl!
I chose to decorate the basket
with her initial...N.


I used a panel from Lakehouse Dry Goods,
printed in bronze to look like cross-stitch.


I had a bit of Jennifer Paganelli fabric
from one of her early lines called Bell Bottoms.
I liked the way it looked
as an accent for the pocket and handles.

{I love blending unexpected prints from unrelated fabrics!}


I really love making these baskets for new moms.
They add a pretty storage option
for little diapers, little books,
little socks and shoes,
and so much more.


Look closely at the Briar Rose prints...
do you see them???


That's right...SHAMROCKS!
They fit right in with this month's

Have you made something with shamrocks, too?
Don't forget to add your photos to the Flickr group!

Until next time...happy stitching!

Pin It

January 16, 2014

Getting Skinny for 2014

I'm not really a fan of New Year's resolutions.
This year, though,
I've decided to GET SKINNY,
and I'm inviting all of my quilty friends
to join me!

{Come on...it's going to be FUN!}

We're getting skinny by having...


No matter what your dress size,
and even if you don't think of yourself as a skinny girl,
you can do this!
It's so easy!!!

to create a one-of-a-kind,
made-by-you, made-for-your-swap-partner


Maybe you remember the month
the Across The Pond Sew Along.

{Susie is super skinny - she made two of them! So inspiring!}

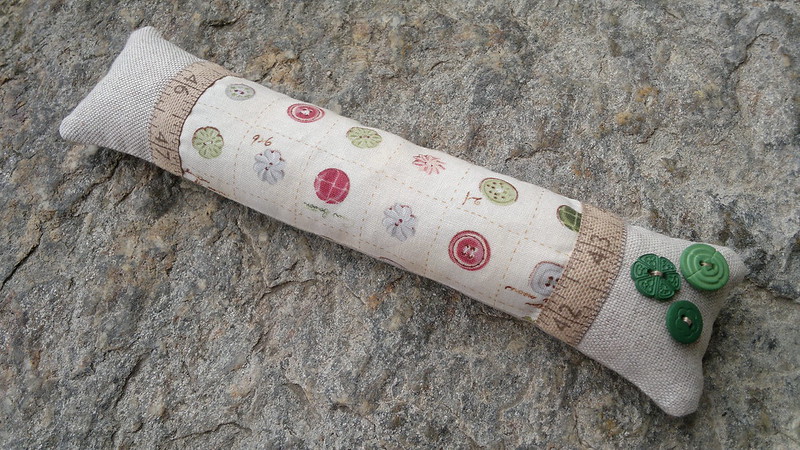
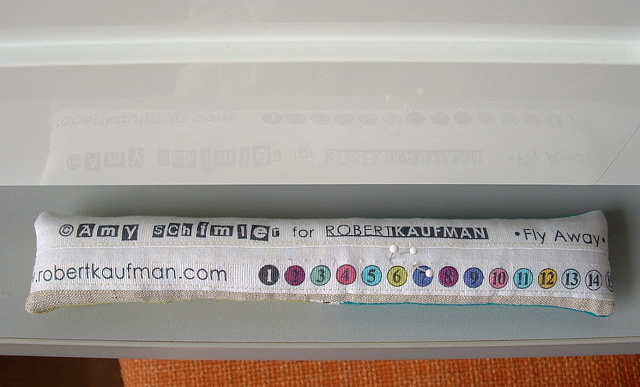
Susie's pair of Skinny Pincushions
My sweet bloggy friend Nesta,
somehow came up with the idea to have a
Skinny Pincushion swap.
It's going to be just the cure for the winter blahs!

Nesta's skinny and sweet pincushion
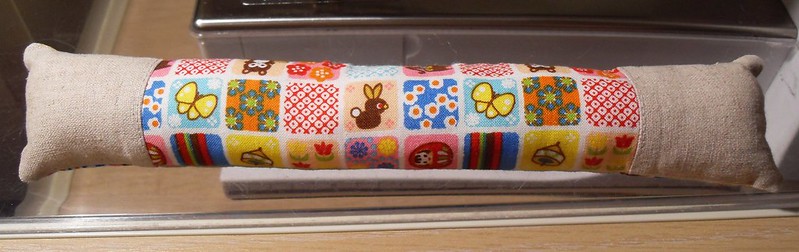
A Skinny Pincushion is easy to make.
You can add some assorted goodies just for fun,
then send it off to a happy new friend...
and wait for your OWN Skinny Pincushion to arrive
from another swappy friend!

The Patchsmith designed a sewing mat to go with her skinny pincushion!
Here's the skinny on the swap:

1. Email me to tell me you would like to join the swap.
eamylove@aol.com

2. Specify whether you are able to ship internationally,
or if you would only want a partner in the US, 
or your home country.

3. Include your own mailing address in the email.
Also include any likes/dislikes and requests about colors, themes, or size.

4. Spread the word to other friends who might want to Get Skinny!

5. The swap registration will close on January 31, 2014 at midnight.

6. You will receive the mailing address of your partner from me,
via email, sometime in the first week of February.

7.  Create your Skinny Pincushion and mail it to your partner 
by February 28, 2014.

That's all!
We have started up a Flickr page,
and you can get ideas or cheer others on,
as they get skinny.

I found lots of inspiration on our Across The Pond Flickr page:

I think this is the BACK of the one by Elly of Mad4Patchwork!
The front is so sweet, too!

So many cute little motifs on one skinny pinny!

Vera of Negligent Style used selvages to make hers unique
and fascinating.

Vera is motivating me to get skinny right now!
Cindy's Skinny Pinny is so stylish
and sweet, in every detail.
Those buttons are just so charming!

Visit Cindy at Adventure's of the Singing Quilter for more ideas.
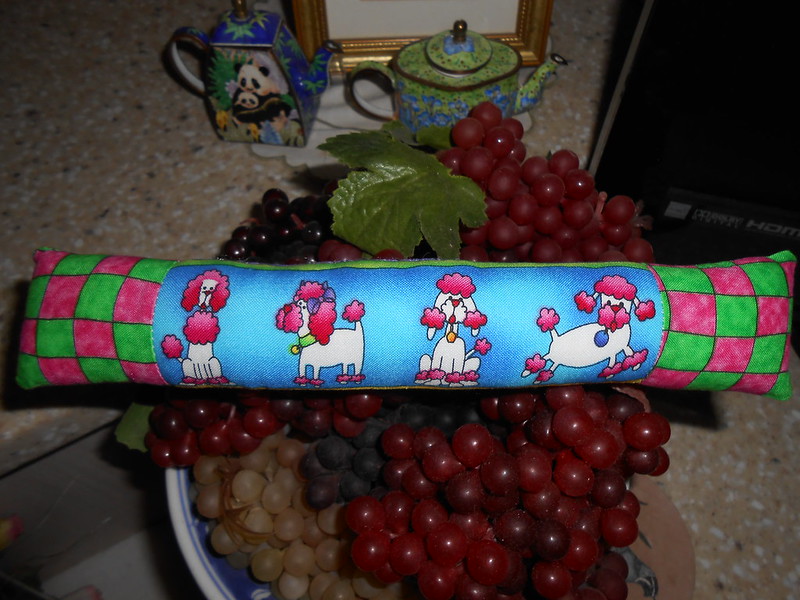
Pennie Pins posed her poodle pinnie
on Flickr.
Pennie's poodles are sitting pretty for healthy snacks.

Top 5 reasons "Getting Skinny" was never so easy:

5.You can do it in less than an hour.

4. All of your clothes will still fit you, no matter what your size.

3.  You can lie down while you Get Skinny,
and you won't need a nap when you're done.

2. While you are getting skinny,
you can eat chocolate or ice cream,
or even chocolate ice cream!

1. You'll have a new Skinny friend,
when it's all done!

So sign up now by emailing me at eamylove@aol.com.
We'll all Get Skinny together!


Pin It

December 1, 2013

Mug Hugs - Across the Pond

For the December edition
Amanda The Patchsmith has come up
with a trendy new accessory...
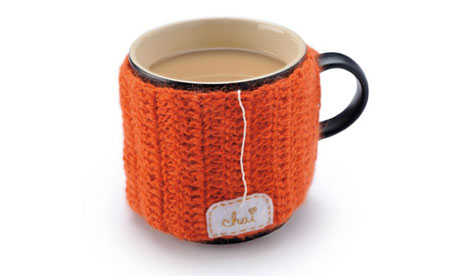
the MUG HUG!

{No, it's not a typo...that's what she calls them. She's so clever!}


Photo by The Patchsmith
That's just ONE of the mug hugs Amanda
has made...a little fox,
using this free pattern by Crafty Staci,
with a brand-new Patchsmith mug rug pattern to match.

{This pattern also includes a super sweet bonus coaster!}


Photo by The Patchsmith
Susie has joined in over at Susie's Sunroom,
showing some darling mug hugs of her own.
The Patchsmith made The Fox, and Susie made The Hound!


Photo from Susie's Sunroom blog
I'm a bit behind schedule in making up any
new mug hugs, but I made this one a while ago,
using a paper sleeve as my template.


This type of mug hug works best on a disposable cup,
as it is tapered in shape.

I used a pretty button as a fastener.
These mug rugs are a great way to use up
one-of-a-kind favorite buttons!


Even though my red mug is straight-sided,
the Christmas mug hug looks pretty cute,
in my humble opinion!


It's time to get out those Christmas mug rugs
and give those hot chocolate mugs a nice hug!


If you'd like to join in the fun this month,
here are some more fun patterns, tutorials
and inspirational photos...
they should get you started!

I think the first time I ever saw a mug hug was in
an issue of Mollie Makes magazine.
Some were knitted and others were crocheted,
so there was something for everyone.

{Instructions are included here.}


Photo from Mollie Makes Magazine
Look at this adorable snowman
mug hug,
with instructions on the Red Heart Yarn blog!


Photo by Red Heart Yarn

At Embroidery Library Projects blog,
you can find full instructions
for making an embroidered coffee cozy.
Plain or fancy, these are really pretty!

{Susie made TWO of these...sort of...stop over to see!}

Photo from Emboidery Library Projects blog
Over at SewMuch2Luv,
you will find instructions for making this
{lovely} mug hug, with...RIC RAC!

{Now, why didn't I think of that?!?!?!?!}


Photo from SewMuch2Luv blog
That ought to get everybody started!
If you make some mug hugs,
please share photos in the Flickr group!


Pin It