Showing posts with label strawberry fields. Show all posts

April 6, 2016

Cathedral Window Pincushions - Spring 2016

Hello, Friends!
I'm getting ready for a fun spring craft fair,
so I've been making some new Cathedral Window pincushions.

{Have you seen glimpses of them on Instagram? My Instagram name is @eamylove.}


I've made lots of these sweet little pinnies.


 I kind of have it down to a science now.


I love to prepare the backgrounds for several pinnies, all at once.
There is a lot of pressing in the first steps,
and I can do the prep work even if I have no time for sewing.
Later comes the fun part...placing the fabrics.
If I have more than one background prepared,
I don't have to fret over selecting the PERFECT combination
of colors and prints.


Instead of stressing, I can actually experiment and play
with various combinations of prints and colors.


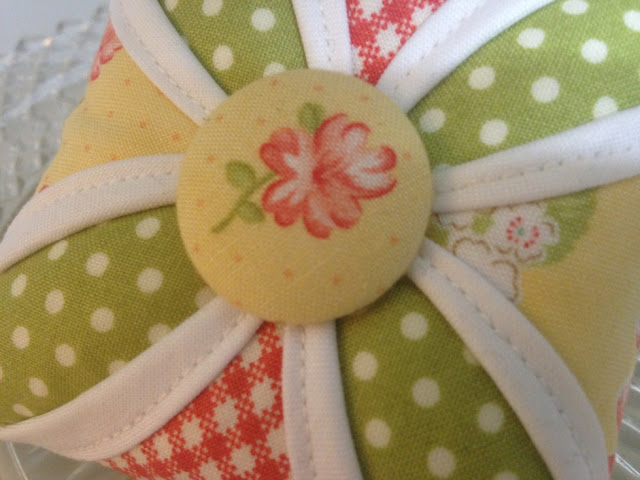
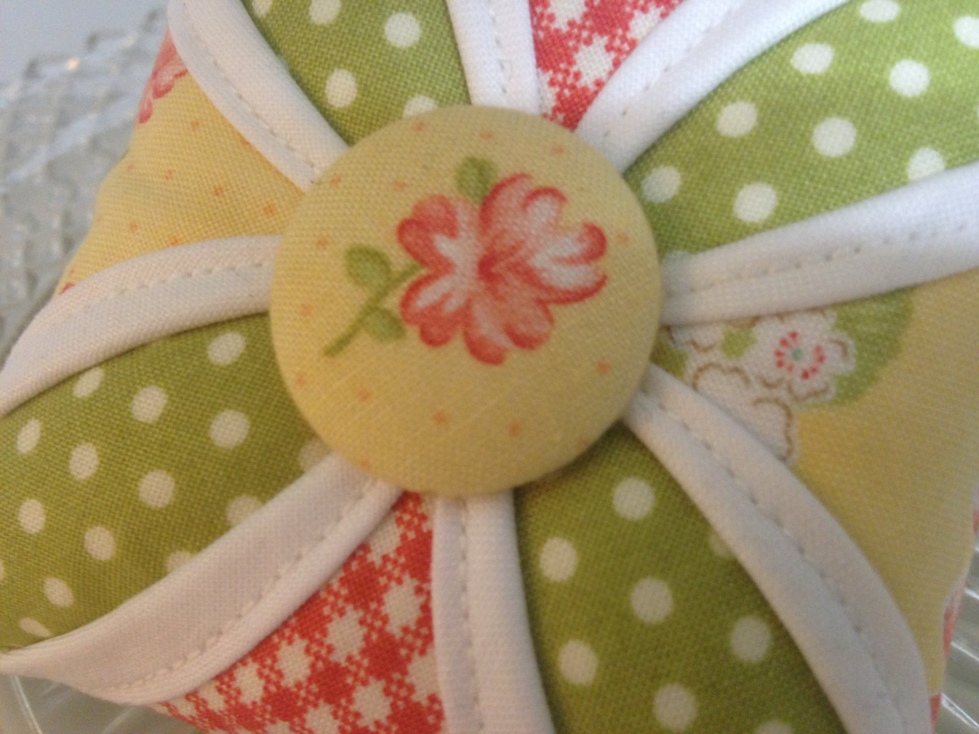
Here is a sweet set I made from
Happy Go Lucky prints by Bonnie and Camille for Moda.


This dynamic duo was made with Strawberry Fields Revisited
by Fig Tree Quilts for Moda.


I have a "thing" lately for that brown, yellow and green palette.
The final touch is the covered button.
They are really fun to create,
especially with a lovely tiny print like this one.


These pincushions look so adorable stacked up together.
They're just a wee bit pudgy...I call them pleasingly plump!


I also made this darling little white pincushion...
in my humble opinion, it's absolutely exquisite!


I will be making one to keep for myself.
The fabrics are Flower Sugar from Lucien.


You can never have too many, or make too many of these pincushions.
Also...you can never take too many photos of them, right?

I hope you don't mind this photo-heavy pincushion post!


Pin It

July 6, 2012

Zakka Water Bottle Holder

Welcome back to the Zakka Style Sew Along, hosted by


This week's project, the Water Bottle Holder, was contributed by

{You must go and visit her...her bags and other projects are wonderful!}


I'm not gonna lie...I was not really panning to make this project.
I figured at some point I would have to
take a break from the quick pace of
one project each week...

{Who knew I would be missing 5 projects before this one?}

But here in Southwestern Pennsylvania,
it's been a long hot summer already!
Temperatures have been
in the 90's and holding.


Motivated by the heat wave, I've already finished my
Zakka Water Bottle Holder!


{Ta-dah!!!}


Let's get started with the fabrics I used...

I wanted this water bottle for my own use,
so I picked some Strawberry Fields {top}
and Buttercup {bottom} prints,
both by Fig Tree Quilts for Moda.

{The European linen I have in Cream
looks just right with the prints!}


I got started stitching, after I read the Flickr group thread,
which warned of a few pitfalls with this project.

I decided to follow the book loosely,
but make the water bottle holder "my way"
using techniques I use when I make my purses.

One thing I did was make the printed outer piece into a divided pocket,
rather than stitch it down all the way across the linen.

I also used Pellon 987F fusible fleece
for the lining, the outer piece, and the pocket.


{I'ts not a big pocket, but I could put some $ in there!}


Also, for the appliqued rectangle,
I made mine kind of big, to show off the pretty contrasting
lining, since it doesn't show up much when in use.

{I used Heat N Bond, and stitched it with a cute zigzag, which made me happy!}


After sewing the "tube" it was time for stitching the "circle"
in place for the bottom of the holder.
This was rather new to me, since I don't make circular purses.
If I had it to do again, I would mark the seam line on the tube
and also on the circle, to match everything up perfectly.

{Here is where I'm going to show you my feet of clay.
It's not very round.  Hmmm...but it worked anyway.}


For the strap, I used both prints,
and I didn't use a turning technique.
Instead, I stitched the two long sides together,
then ironed 1/4" under on each of the other two long edges.

{I stitched near both edges and had this pretty strap when I was done.
I just inserted the strap ends between the outer piece and the lining,
before sewing along the top edge.}


You know, I don't really like water.
But recently I was introduced to these fantastic
flavored concentrates, and I am crazy about them!

{Have you tried them?  Do you have a favorite?
Mine would be the Blueberry Lemonade.}


I think this little holder will be going lots of places with me this summer!


Pin It

May 8, 2012

Zakka Style Itty Bitty Quilt Block Magnets

Are you still sewing along with Zakka Style?
I am...can't believe I'm keeping up
with this pace, but it's so much fun!

{Come along with us...details are at LRStitched!}


This week I made something that I'm keeping
for myself!

{All of my other Zakka Style projects have been listed for sale in my shop on Etsy, eamylove.}


They really ARE Itty Bitty Quilt Block Magnets! 
They finish at only 1 1/2" square!

This chapter's contributor is Nova Flitter,
who blogs at acuppaandacatchup.com.
Go and say hello to her lovely posts!

Adrienne of Little Bluebell  - another beautiful blog - 
has her own version posted this week for the Sew Along.
She has some great tips for this project!

{I'm going to give you my tips, too!}


One of the coolest things about this project is 
that you barely need any linen at all.  
Here is the scrap I used.  
I actually had enough to make all 6 magnets from this little bit!

{I actually considered...briefly...throwing this irregular bit away!  OMGosh!!!}


I cut all my linen pieces out first.
I used my favorite...100% European linen in Oatmeal.

{CONFESSION:  I cut my pieces for the triangles a tiny bit larger than the directions, 
rounding up to the nearest 1/4".  
That allowed me to cut the HST's to the perfect size when I squared them up.}


Next I cut all of my prints...
I kept them organized, in little stacks,
one for each block.

{I used coordinates from my Winter Dresden Quilts project...still a WIP, but coming along.
The gingham is from Strawberry Fields by Fig Tree Quilts.  The floral is from Martinique by 3 Sisters, and on the back I used one of my Winter scraps from Minick and Simpson for Moda.}


The BEST tip from both Nova and Adrienne was to shorten the stitch length.
It made it so much easier to stitch without the wee blocks shooting through my sewing machine.  

I squared up my pieces everytime I could...
BEFORE finishing each block, and AFTER.

{I LOVE this tiny block!}


Here they are, all done.
They were actually pretty perfect!
I was having fun now!!!

{They are not quite flat in this photo.}


You know me...I use Pellon 987F Fusible Fleece by the bolt.
I diverged a bit from the instructions and used that, instead of regular batting.
I thought the blocks looked very sweet the way they were, 
so I did not do the quilting, as the book suggested.

{I can't believe I'm admitting this...I thought about leaving this block out, 
because I didn't feel like  printing out a paper-piecing template.  
Turns out you don't need one!
And this one is now my very favorite one of all.
And it was THE MOST FUN to stitch!}


When it was time to turn the teeny blocks
right side out, I was sooooo glad I'd used the fusible fleece!
It helped to hold my little stitches in place
during this stressful process.

I used Darice Super Strong Ceramic Magnets
inside my blocks.  I found them at a local crafts store.

{I listened to the good advice to make sure the magnets were positioned correctly, 
so they would stick to the refrigerator!}


I love them so much...

{They are as sweet as a dessert!}


Go ahead...try them!

{But these ones are mine!}


Pin It

March 31, 2012

Winter Dresden Plate Quilt

Spring has sprung,
 but I still have some Winter designs in my quilting thoughts.


I joined the fun with the Bunny Hill Scrappy Plates Club, 
starting in January.
This is my first time sewing along with a project like this, 
and I'm having great time!

{If you haven't discovered Anne Sutton of Bunny Hill, you're in for a treat!}

The project makes great use of Darlene Zimmerman's EZ Dresden Ruler, which I found for a great price here.


I knew I had one already, 
but I couldn't find it until AFTER I had ordered a new one. 
 {A glimpse into my "real world"...sigh.}
But that's okay, because I also ordered another new template, 
which will be featured someday in another post.

January began with a burst of activity.  
We gathered up our "scrappy" fabrics and cut dozens of blades for the plates.  I chose to use my layer cake of Winter by Minick and Simpson from Moda.


I sliced and sorted my blades...each plate needs 20 blades, 
and there are 12 plates in the quilt.  


I made some extras, because I want to make a couple of pillows, too!


{I even had a wee bit of extra layer cake fabric left, 
so this is a great choice of precut to use for this project.}

Here are chains of blades, stitched at the ends.


They were all pressed into the pointed wedge shape...


Here they are, stacked on my winter cake pedestal.  


Yummy, huh?


But we weren't finished yet!  The blades were stitched together in groups of 20, and pressed into beautiful "plates."


Now they really looked good enough to eat!


For February, the plates were appliqued onto the background squares.  Hmmm...since Winter is now out of print and hard to find, I chose a red gingham from Strawberry Fields by Fig Tree Quilts from Moda.
I ran short and needed to buy a bit more, just for that last block.
{AFTER that, I found one more yard of the gingham in my stash.  A theme emerges...}
But that's okay...I have so many big plans for that red gingham!

I straight-stitched my plates to the background...


Then I used HeatNBond to fuse my center circles in place.  
I used my machine to blanket-stitch the centers.
  

{My favorite stitch!}


Ready for the next step...uh-oh!  Today is March 31st, and I have not done the March step.  And I have to be at work by 2:30 p.m. today.


 Not to worry...
the Bunny Hill Scrappy Plate Club gals are very sweet, 
and they won't mind if I catch up later!

In fact, why don't you join us now, if you haven't already?
Catch some more inspiration at our Flickr group!


Pin It