Showing posts with label thread. Show all posts

July 11, 2015

A Value-able Lesson - Cool Threads

is really getting a workout these days,
as I try to catch up with the sew along!


I'm learning along the way.
which minimizes distortion from pressing.


Also, I use skinny thread,
(Aurifil 50 wt)
to make my block sizes very close to 
a perfect 6 1/2" square at the end.


Today I'm showing my version of the Cool Threads block.


Now, I have a confession to make...
here are the "spools" I made at first.
When I laid them out for assembly,
I didn't love the way the colors looked together.
They didn't clash, but they didn't excite me.


I really liked that light blue one,
so I whipped up three new spools,
and this time I was satisfied.


I started to think about what made me react
differently to two similar blocks.
The difference was...value!

Here's the first block,
photographed in black and white.
One of the blocks "stands out"
from the others, being too dark.
The others are of similar value.


In the block that I liked,
there are two blocks that are darker,
but they are balanced by placement,
and the four blocks seem to belong together.


I really like those "extra" spools,
especially the navy one, and will save them
for another block to be made someday.


I like the way that teeny stripe looks like twine.


Never mind...in my final block,
I liked the way this spool looks like
variegated thread.


While I've been stitching from this book,
I noticed that a whole lot of blocks need
1 1/2" squares from the background print.
I cut some extra squares, to keep in a pretty bowl.

{I like "pretty" organizing tips, don't you?}


I hope you've enjoyed my value-able tip
and will stop by again soon!


Pin It

August 9, 2014

Hexie Flower Tutorial and Summertime Pouches

Today I'm blending two of my latest fascinations:
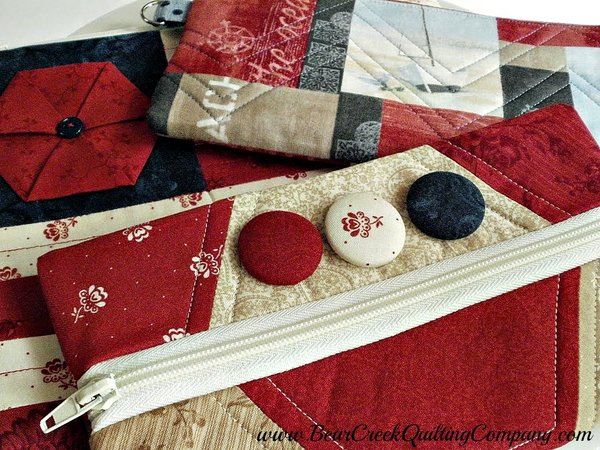
hexagons and zippered pouches!

Pop over to visit
where I've guest-blogged in detail
about these Red, White and Blue


While you're in the neighborhood,
shop around at Bear Creek Quilting Company...
you never know what goodies you'll find there.

Besides yardage and pre-cuts,
in any color you want.

I used a few spools of Aurafil thread
when I made my summertime pouches,
and the stitch quality was just gorgeous.


The stitching is
just as pretty on the back as the front...
a true sign of a good quality thread,
along with the right tension on my sewing machine.


I used a Honeycomb pack of Midwinter Reds
by Minick and Simpson for Moda
for two of the summertime pouches.

{Midwinter Reds really work for midsummer stuff, too!}


Would you like to see a detail of 
how to make the hexie "flower"
on the flag pouch?

{Yes, I thought you would like that!}


Start with a hexagon of any size...
mine came from a Honeycomb pre-cut,
so they are 3" on each side.

{They measure 6" from point to point, according to the package.  That would be from one point to the one directly across from it.}


Begin by turning the hexagon over,
wrong side up,
and fold every other corner
to the center,
pressing with a hot iron as you go.

Here's the first corner folded...


and the second...


and the third.

{All three corners meet neatly in the center. It's okay to have a wee bit of overlap.}


Now you've got a triangle.
Take each of the three points,
and fold them to the center,
pressing them into place with that hot iron.


That's so easy, right?
Now tack those center points together
and use a little button to finish it off.


Starting with a hexie that measures 6",
the flower finishes at about 1 3/4" on each side.


I place my hexie on the front of my flag pouch.


I'm sure I'll use this accent for many more projects.
I hope you'll try making hexie flowers, too!


Pin It