Showing posts with label fabric. Show all posts

October 26, 2016

Spooky Delight Table Topper

Hello, Friends!
Halloween is coming up soon.
I'm all set, now that I've finished making my
Spooky Delight table topper!


{See the pillow back there on the couch?}


I got a lot of mileage out of just that one Spooky Delight charm pack!
There are even a few squares left...
I decided not to use the purple and green ones.


For the pillow,
 I had used some of the low volume squares
from the charm pack for the "background," 
supplemented with "Porcelain" Bella Solid fabric.


I went a different direction for the table topper,
choosing "Steel" gray Bella Solid
for the background.


For the backing, I used the same gray solid.
I added a strip of extra HST's for interest.


True Confession:
There is a little PUCKER on the back. 
There was a big FROWN on my face when I saw it.
I just left it there.

{The PUCKER - not the frown. I'm over it.}


I just adore the vintage vibe from this fabric line,
by Bunny Hill for Moda.


I wanted a bright skinny orange border 
for the table topper.
I turned to another wonderful fabric line...
for Connecting Threads.


I know now why it's named Good Neighbors...
these fabrics mix very well with other lines.
I used some of the gray stripe from Good Neighbors for the binding.
I think it's just right...on both sides.


I'm all set for trick-or-treaters now.
We'll keep the lights low to make the house more spooky.


Come back soon to see some more decorations
for fall and Thanksgiving at my house!
Here's a sneak peek...


Happy Halloween!

Pin It

September 25, 2015

Scrappy Stuff - Farm Girl Vintage

Hello, Friends!
I've got some more blocks to show you,


Now that autumn is on its way,
the leaves are starting to fade and fall.
The Scrappy Maple Leaf block is a sweet way
to make this lovely season last and last.


I spent a lot of time choosing my fabrics for this simple little block.
I love how it looks....a wee bit rustic,
lying beside some fall dishes.


Or sophisticated, posing on a crystal plate.


Wouldn't it make a pretty mug rug for this yellow bowl?


The next block featured in the Farm Girl Vintage book is
Scrappy Strawberry.
The one in the book was pink, but I prefer a juicy red berry myself.


I have more reds than greens, but I still had to repeat my fabrics.
"Use twenty-two different scrappy fabrics," said the instructions.
I'm still giggling.

{Oh, wait. I probably have that many in my stash...somewhere.
But I'm not going to all that trouble to find them.}


Strawberries always look better on a pretty dish, right?


Come back soon for more blocks, fresh from the farm!

Pin It

February 20, 2014

More Thoughtful Pincushions - Part 1

It's my firm belief that 
you can't have too many pincushions.


I'm finding lots of wonderful friends who feel the same way,
and that's how we ended up with
53 skinny members of the
Skinny Pinnie Pincushion Swap!

{Once my partner has received her new pinnie, I'll show you that one.}


One day last week, I had a free sewing day!
I decided to make some more
using my Susan Branch illustrations.

{This was the first batch of Thoughtful Pincushions I created.}


Before anyone asks,
I must say that I've looked all over the web
and haven't found a source for the wonderful panel 
of quotations, illustrated by Susan Branch.

{Luckily I had quite a few squares left, even after sharing some with friends.}


I wanted to create this new batch of thoughtful pincushions
in the most playful way possible,
so I cut a whole bunch of colorful fabrics
into 1 1/2" strips.

{I'm pretty sure that in heaven, there will be giant heaps of fabric strips like this,
and all of the quilters will be allowed to jump in them, all day long.}


The real fun began when I chose the fabric strips for each quotation.
I made a log cabin style block for the front of each pinnie.

This one called for bright colors to go with the dried flowers.


I liked the old-fashioned prints
placed side by side with the modern fabrics.

{Repro prints from my earliest stash, along with Scrumptious and Mama Said Sew fabrics.}


Here's one I made for a singer...
who loves pink.


What a sweet quotation, huh?

{Bonnie and Camille fabrics...Marmalade and Scrumptious.}


This next one is a little bit country...


It made me feel warm all over, so I chose a dash of red,
with a bit of black and some gray and green.

{More Scrumptious, a bit of Bake Sale by Lori Holt, Mama Said Sew - again! - and a bit of a cherry print from JoAnn.}


I really loved the colors of this little nosegay,
and I pulled out some bright strips from the pile.


The finished block makes me smile!

{Marmalade, polka dots from Riley Blake, Briar Rose and green gingham from a vintage sheet.
The background is from Tanya Whelan's Sugar Hill line.}


Here's a quotation that would obviously look great
with lots of hot pinks and reds.


For some reason, though,
I decided to go sugary-sweet for this block.


Look what happened...so sweet that it makes my teeth hurt!

{All by Tanya Whelan...Rosey and Sunshine Roses.}


This last one...for today...is my new favorite, I think.
The quotation is as lovely as the drawing,
and I decided to go bold with my fabric choices.

{"Just living is not enough," said the butterfly.
"One must have sunshine, freedom, and a little flower."
Hans Christian Andersen}


I adore the drama of the black print against the lime greens,
with a taste of orange and blue!
This combination will definitely show up again
in my sewing future.


Stop by again soon, for Part 2,
to see the finished pinnies!

{I promise not to make you wait very long.}


Pin It

September 9, 2013

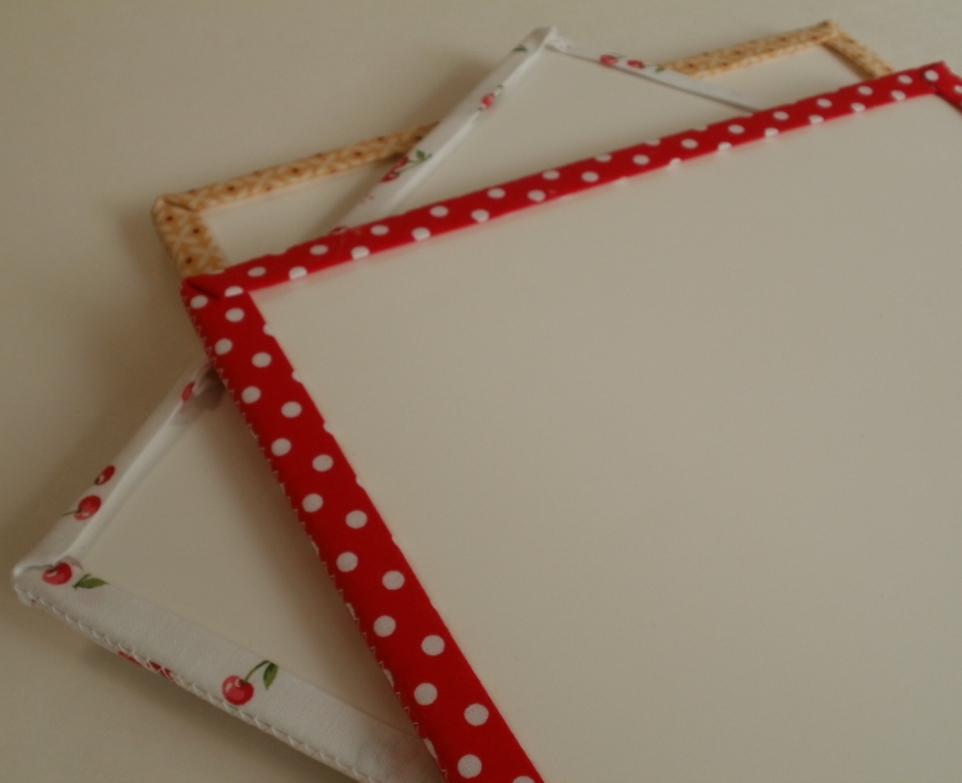
Mini Design Boards

Lately there has not been a whole lot
of time for sewing at my house.
When I can't sew, I THINK about sewing.

{I call it research.}

Photo from The Graphics Fairy
and she showed us how to make her adorable
Mini Design Boards.

Even in my little house, I've got space for these!
I got busy and made myself 6 of them!


It really rang true when I heard Lori Holt say
that most mistakes made during block assembly,
happen between the ironing board
and the sewing machine.

I'm hoping these organizing boards will cut down on my errors
in that department!


I had fun picking out some favorite fabrics for the edges.


Lori's method of trimming the raw edges with fabric
is really fun and easy,
with super-cute results!


If you're not a fan if videos,
there is a post with the same tutorial,
found here on the Bee In My Bonnet blog.


I followed the tutorial exactly as it was described,
and I have just one additional suggestion:
Keep a bowl of ice water handy,
for when you can't resist trying to get those corners
nice and neat.  Ouch!  That glue is hot!!!

{Oh, who's gonna notice that the edges are not quite perfect?  Just have fun!}


Pin It