Showing posts with label buttons. Show all posts

January 2, 2017

Snowman Coasters


Hello, Friends!
Happy New Year!

Today I'm sharing some snowman coasters
that I made for a dear friend.


It's so cute in grays and whites, with colorful scarves.
As soon as I shared the pattern photo on Facebook,
my friend asked me if I wanted to make some for her.

{It's hard to say which one of us was most excited!} 
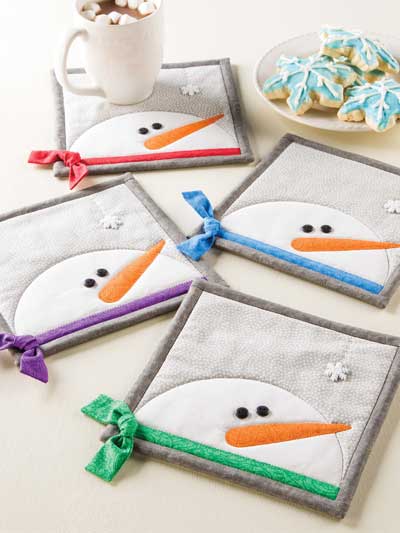
Photo from Annie's e-Patterns Central
Snowman Family Mug Rug Set
I chose some of my Cherry Christmas prints,
by Aneela Hoey for Moda...
and I made each one a wee bit different,
but coordinated.


This was such a clever pattern!
True...the little scarves were very tiny
and a bit fiddly to turn right-sides-out.
But they're simply adorable, right?


I found some snowflake buttons at my local Walmart.
They're nice and flat, with just the right amount
of silvery sparkle.


 These little snowmen will warm hearts
all winter long.


Living in Pennsylvania,
we have already seen some snow this winter.
I'll have to make some more snowman
projects to warm my own home!


Have you found a favorite winter pattern?


Pin It

March 15, 2016

My Pixie Basket

Have you see it the Pixie Baskets
making their way into blogs and
Instagrams and every quilter's heart?
Here's my contribution to this teeny trend.


Heidi Staple of Fabric Mutt
has generously provided a free tutorial,
so that anyone can make a Pixie Basket.
They require very little fabric and time...
and you get a whole bunch of cuteness in the end.


I used some scraps of Simply Color
by V and Co for Moda, for my basket.


I like the navy blue interior and the lime accent band
against a lighter outside fabric.
This little basket aren't destined to get very dirty, after all.
It will be kept on a pedestal and will only be asked to stay cute.


And speaking of cute...
can you barely stand the sweet buttons inside the basket?
They are a treasured gift from my dearest friend,
and I recognized those button cards right away.


by the incomparable Amy Sinibaldi of nanacompany.
You can print them and attach your own favorite buttons.
Trust me...they make an awesome present.

{Mother's Day is just around the corner, here in the USA...}


Just sayin'...
Pin It

August 9, 2014

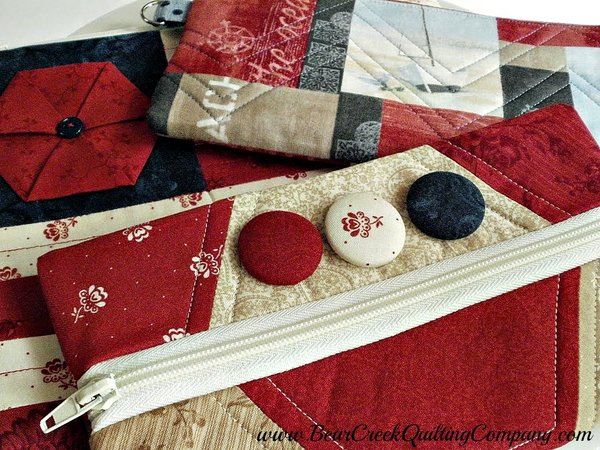
Hexie Flower Tutorial and Summertime Pouches

Today I'm blending two of my latest fascinations:
hexagons and zippered pouches!

Pop over to visit
where I've guest-blogged in detail
about these Red, White and Blue


While you're in the neighborhood,
shop around at Bear Creek Quilting Company...
you never know what goodies you'll find there.

Besides yardage and pre-cuts,
in any color you want.

I used a few spools of Aurafil thread
when I made my summertime pouches,
and the stitch quality was just gorgeous.


The stitching is
just as pretty on the back as the front...
a true sign of a good quality thread,
along with the right tension on my sewing machine.


I used a Honeycomb pack of Midwinter Reds
by Minick and Simpson for Moda
for two of the summertime pouches.

{Midwinter Reds really work for midsummer stuff, too!}


Would you like to see a detail of 
how to make the hexie "flower"
on the flag pouch?

{Yes, I thought you would like that!}


Start with a hexagon of any size...
mine came from a Honeycomb pre-cut,
so they are 3" on each side.

{They measure 6" from point to point, according to the package.  That would be from one point to the one directly across from it.}


Begin by turning the hexagon over,
wrong side up,
and fold every other corner
to the center,
pressing with a hot iron as you go.

Here's the first corner folded...


and the second...


and the third.

{All three corners meet neatly in the center. It's okay to have a wee bit of overlap.}


Now you've got a triangle.
Take each of the three points,
and fold them to the center,
pressing them into place with that hot iron.


That's so easy, right?
Now tack those center points together
and use a little button to finish it off.


Starting with a hexie that measures 6",
the flower finishes at about 1 3/4" on each side.


I place my hexie on the front of my flag pouch.


I'm sure I'll use this accent for many more projects.
I hope you'll try making hexie flowers, too!


Pin It