Showing posts with label purse. Show all posts

June 10, 2017

Anita Vacation Tote Bag - Black, Red and Linen Version

Hello, Friends!
Are you going to be traveling this summer?
I took some business trips recently,
so I made myself a new tote bag.


Do you recognize the pattern?
It's my very own "Anita Vacation Tote Bag" design,
available as a PDF pattern here on Craftsy, or


For this latest version,
I wanted a mostly-neutral bag that would go with
a lot of my business wear.


The main exterior fabric is a floral print
from the original Mama Said Sew line
The contrasting fabric near the top of the bag 


The interior of the bag is also made from
the Essex Linen.
I find it to be very durable, especially when interfaced with
Pellon 987F fusible fleece, as I do for all of my purses.


Inside my bag, along one edge,
I use a strip of pockets,
to keep my sunglasses and other key items handy.


How do you like that cute zippered inside pocket?
For the inside of the pocket, I used a coordinating Sweetwater print,
from Volume II. 


What about that magnetic snap closure?
If you don't know how to add those,
my pattern will teach you...it's sew easy!


Even if you're not going on a vacation,
They make an excellent gift for a new grad!


Come back soon...we'll chat about this sweet pouch
that I also made, to coordinate with my new Anita Vacation Tote Bag.


Pin It

April 9, 2016

Purple and Pink V and Co Tote Bag

Hello, Friends!
So...you know me pretty well,
after reading my posts and seeing photos of my projects, right?
How many times have I used purple?
Hmmm...have I ever used purple???

{Crickets...}

Do I even OWN any purple fabric?
There's a lilac print in this divided basket...maybe that counts.


I've been stitching with this junior layer cake
in the purple colorway.

{You can find lots of other colorways, too, over at Kimberly's Fabric Stash.}
There are shades of pink on the top layer,
but a lot of the fabrics inside are purple.
They are actually very purple indeed.


When I opened it, I could feel my heart racing...
uh-oh...I think I may have a touch of purplaphobia.


I have a bundle of the Ombre Basics, also by V and Co.
When I put them together with this layer cake,
I could see that the plum and magenta ombres 
went together just perfectly.
It calmed me considerably when I saw the potential!


I cut some squares from the ombres,
and some more squares from the purple and pink prints,
and I created a wild and crazy tote bag.


I really love the way it turned out.
There's plenty of room inside, with the bag
measuring about 11" wide by 10" tall.


It's a full 6" deep.
It would make a great travel tote bag.


I love the various solid shades of ombre,
interspersed with the bright prints.

Along the bottom of the bag,
I used a strip of the darkest ombre shade.


It's very difficult to photograph,
but I made a large patchwork of prints
and solids, to add interest to the interior.
I always use a large piece of yardage for the lining
of my bags, so this was another step out of my comfort zone.


Even the handles were patched from
three different layer cake prints. I love the look!


My mother doesn't read this blog...
shhhh...this tote bag is right up her alley!
Mom looks great in purple and really loves to accessorize.
I can't wait for Mother's Day, when I give it to her!


This project has been therapeutic for me.
Maybe next time I won't go into a purple panic,
when I see 50 shades of violet!


Do you have a color phobia, too?

Pin It

November 11, 2014

Some Guest Posting - Hexagons and Elementary Fabric

Maybe you've noticed already...
I've been doing a bit of guest posting


I just finished a 3-part blog series,
by Sweetwater for Moda.
I had been drooling over this line of fabric
since the first time I saw it...
it must be because we have so many teachers in my extended family!


In Part 1
I test-drove a new-to-me specialty ruler,
I can only begin to describe how FUN this tool is to use.


You can make such a variety of hexagons,
each one using similar simple steps.


There's a video here, that I referred to for lots of ideas.
Sometimes the simplest designs are really stunning.


These hexagons are a lot like snowflakes...
each one unique, and also beautiful.

{Oooooh! I just inspired myself...I think I'll have to try making some in wintery fabrics!}


In Part 2
those hexagons were put to use
when I created Textagon Mug Rugs.


Each of these would make a great gift
for a teacher or a student,
don't you think???


For Part 3
I decided to design a Library Book Bag,
featuring hexagon blocks on the front and the back.


Like it???
You can follow the tutorial to make your own
Library Book Bag.


I've got some leftovers from my fat quarter bundle,
just begging to be made into gifts
for teachers and students.

Stop back soon to see what I'm going to make
with this A+ Elementary fabric. 

Pin It

October 26, 2013

Purse Palooza 2013 - The One Piece Bag by Fig Tree Quilts

As a person who loves to make
bags, purses, and pouches,
I've been enjoying

I actually tried out a brand-new-to-me pattern
that I was smitten with,
from the time I first saw it on the Fig Tree Quilts blog.

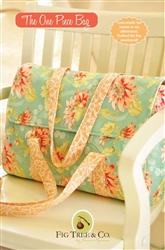
It's called the One Piece Bag,
and you can find the pattern here,
in PDF or paper format.


I made this bag for a friend,
and she requested black and white fabrics.
I used a beautiful damask from Michael Miller,
for the body of the bag.
The shoulder straps are a large polka dot.

{Did you really think I'd make a bag without polka dots?}


This is a really cool and sophisticated purse,
very large and spacious, with a messenger-style flap,
but lots more style than I've seen in most messenger bags.

A magnetic snap holds the flap in position.


I don't have a photo showing how it looks
when it's being carried,
but the straps are nice and long,
letting the bag fall along the hipline.

I love the way the straps are attached
to the outer bag early in the process,
to allow for some decorative support stitching.


My friend requested lots of interior pockets,
in a strip, to keep the bag contents organized.
I figured out where to position two contrasting pocket strips
so that they line each side of the bag.

{My little label shows that I made this bag just for her.}


I'm not gonna lie...I was a little nervous making this bag
for the first time, because of the pocket modification
and also because it was my first time installing 
little feet on the bottom of the bag!

It turns out that the feet are applied much like magnetic snaps,
and in just a few minutes,
I had added an amazing professional touch!

{Here's a view of the bottom of the bag.}


When I had the bag all finished up,
there was one little thing that kind of bothered me.
I felt like the top of the gusset was too wide,
and the flap had a gap at the top.
I just pinched the top of the gusset
and stitched a pleat in the top edge.


The result was kind of a teardrop shaping
that really dressed up the finished bag.

I.Love.This.Bag.


I hope my friend loves it, too.
Someday...I'll make another one for myself.


Pin It

January 14, 2013

Getting Purse-onal

One of the best parts about living in Pennsylvania
is going through the changing seasons.

Now that Christmas is over,
I need a purse for the rest of the winter.
I decided to make a new version of my last bag,
this time using the Granite colorway of
Joel Dewberry's Aviary2 fabric line.

{That's right:  I convinced myself that Anita New Tote Bag.}


Living in the Pittsburgh area,
we are partial to Black and Gold.

I've used these same prints for other projects,
and I've never been disappointed with the results.
I hope you don't mind if I reminisce for a while
about some of my past finishes.

I just love this trio of modified wristlets
I made from  the Sweet Pea Totes


And you know how much I favor the Bow Tucks Bags
These two are especially stunning,
in my humble opinion.

This one features that sparrow I have grown to adore.


This one is more graphic, but just as pretty.


Recently I made this little pouch as a gift.
My niece requested one for Christmas, too,
and I was happy to oblige!


I guess I always knew I wanted a purse of my own
from this fabulous fabric line,
and the time was right for me to go crazy with it!
Here's another view of my new tote bag.


I am so happy with the zippered pocket inside,
with the glamorous gray zipper,
to safeguard my wallet.


Opposite, there is a nifty pocket strip,
to organize my other stuff,
but I couldn't get a great photo.

{So instead I'll show how cute that zippered pocket is...INSIDE.}


Now here's where I get REALLY personal...
look at some of the things I made to put inside my tote.


First off,
I had to make a cover for my brand-spanking-new
ASUS Transformer tablet...
which is nothing short of awesome.
I used my own pattern,
I just added a skinny strap for carrying it separately.

{I didn't use linen this time...but I COULD have.}


That little pocket is so nice for holding 
a bit of money and a small notebook,
plus my cleaning cloth, 
for keeping my screen shiny.


Here's how the ereader cover looks on the back,
displaying MORE accessories...


I made a checkbook cover, a business card holder,
and a tissue holder!


Then I needed a sweet pouch to hold the chargers for my
cell phone and tablet.


in size Small.


There is plenty of room for the chargers and more,
because there's a boxed bottom.


OK, here's one more view of all the things I can carry in this tote bag...
including my umbrella and sunglasses.

{And there's still room for a book and a bottle of water!}


I can't wait until springtime, when I know
Anita Bright New Bag for Spring.


Pin It