Showing posts with label table topper. Show all posts

October 26, 2016

Spooky Delight Table Topper

Hello, Friends!
Halloween is coming up soon.
I'm all set, now that I've finished making my
Spooky Delight table topper!


{See the pillow back there on the couch?}


I got a lot of mileage out of just that one Spooky Delight charm pack!
There are even a few squares left...
I decided not to use the purple and green ones.


For the pillow,
 I had used some of the low volume squares
from the charm pack for the "background," 
supplemented with "Porcelain" Bella Solid fabric.


I went a different direction for the table topper,
choosing "Steel" gray Bella Solid
for the background.


For the backing, I used the same gray solid.
I added a strip of extra HST's for interest.


True Confession:
There is a little PUCKER on the back. 
There was a big FROWN on my face when I saw it.
I just left it there.

{The PUCKER - not the frown. I'm over it.}


I just adore the vintage vibe from this fabric line,
by Bunny Hill for Moda.


I wanted a bright skinny orange border 
for the table topper.
I turned to another wonderful fabric line...
for Connecting Threads.


I know now why it's named Good Neighbors...
these fabrics mix very well with other lines.
I used some of the gray stripe from Good Neighbors for the binding.
I think it's just right...on both sides.


I'm all set for trick-or-treaters now.
We'll keep the lights low to make the house more spooky.


Come back soon to see some more decorations
for fall and Thanksgiving at my house!
Here's a sneak peek...


Happy Halloween!

Pin It

September 17, 2016

Little Ruby Table Topper

Hello, Friends!
I have a little table topper to share today.
I made it from a Mini Charm pack of Little Ruby
by Bonnie and Camille for Moda.


I didn't have a pattern for this table topper,
but I was definitely inspired by Sherri from A Quilting Life.
showing a sweet way to lay out the squares on point.

I had just received my mini charm pack,
and I just "needed" to make something with it.
I cut some a whole bunch of 2 1/2" white squares,
and in almost no time I had the quilt center finished.


I really LOVE the way that many designers
use a color palette that blends one fabric collection
with other lines that they've produced.
It makes it so easy to finish precut projects,
even when you don't have yardage from the same line.
I used a fat quarter from Hello Darling
to create a mitered border.


There were only a few squares left over
from the mini charm pack.
I used those to make a pieced backing.
I chose a piece of blue scallop fabric from
the original Ruby line, for the rest of the backing.


For the binding, I chose a bias stripe
from a fat quarter of Hello Darling.


I think this topper looks pretty on the front...


and on the back, too!


{I really love pieced backings...don't you?}


Sometimes you just feel the need to create.
Those mini charms will burn a hole in my sewing stash,
if I don't make something with them soon.


This project was so enjoyable that 
I would not mind stitching up a bunch of them
into table toppers like this.


What do you like to make with your mini charms???

Linking up with Fabric Frenzy Friday!


Pin It

March 26, 2016

An Easter Present for Everyone - Bunny Garden Tutorial

Hello, Friends, and Happy Easter!
Bear Creek Quilting Company has just published
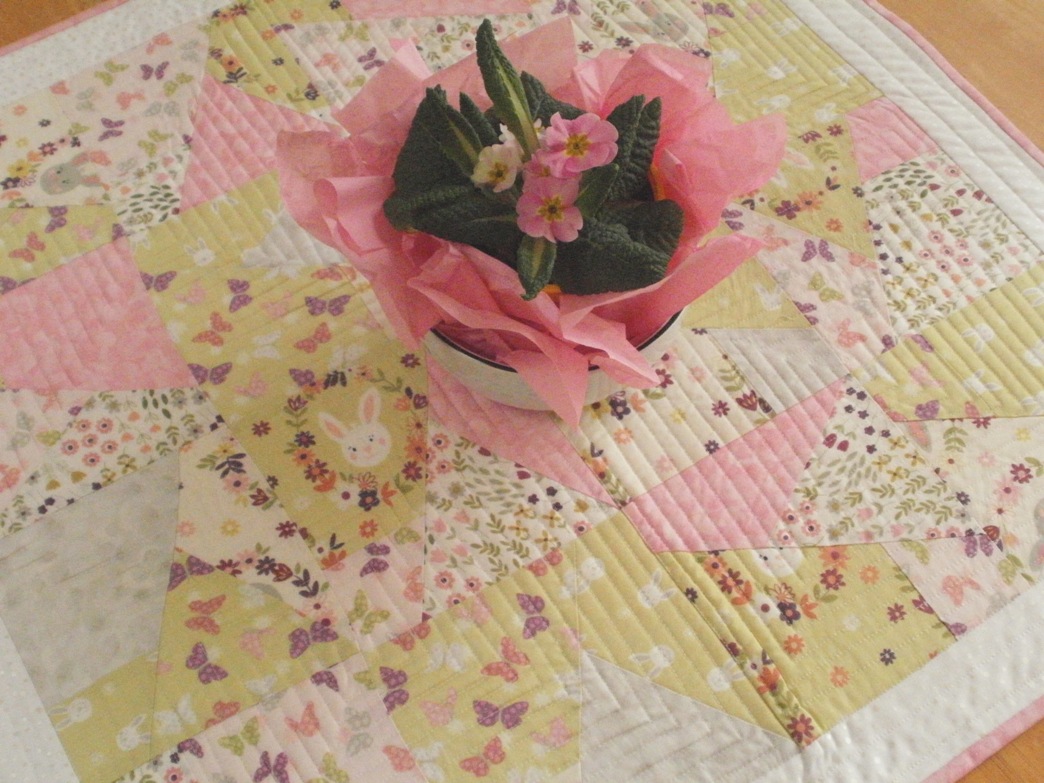
for a Bunny Garden Table Topper tutorial!


{Be sure to scroll down to the
because there's an awesome giveaway going on, too!}


There's a super cool template set that I used
to make this table topper, and I gave it four bunny feet up,
in my review. 
Made by Creative Grids,
Any quilter would enjoy this tool,
novice or experienced. It made this project so quick and easy.


I couldn't resist giving a sneak peek of this fun project,
on my Spring Primroses post.


The fabrics that I used are from a new-to-me designer
called Lewis and Irene. 
This line is called Bunny Garden,
and I am enchanted by the soft tones and
whimsical artwork of these prints.


Bunny Garden is perfect for springtime and beyond...
wouldn't these fabrics be lovely for a baby's nursery,
children's clothing, or a baby gift?


My sister Susie at Susie's Sunroom
 has created the most charming baby gift set,
made up of a soft toy, a pillow and a book.

{I am definitely going to steal copy this idea! I am admitting it now.}

Photo from Susie's Sunroom blog
to learn how to make your own table topper
and to register to win a $50 gift certificate to
Bear Creek Quilting Company!


Happy Easter, everyone!


Pin It

March 12, 2016

Spring Primroses

Every year, I look forward to seeing
primroses for sale in my local grocery store.


Look at this wave of color!
Who can resist bringing home one of these
signs of springtime sweetness?


Then, every spring, I get my little flower home...
and it looks kind of...lonely...in that plastic pot.
Oh.My. Kind of sad.
:0(


I had planned to use the primrose as a prop
for my latest blog photos.
So...I took 5 minutes and a few supplies
that I had on hand,
and I gave my little primrose pot a makeover.


Do you have 5 minutes?
Here's a fun way to spend it.

{Note: This pot has no drainage holes. If yours has holes,
you'll need to place some plastic around the pot,
to keep the paper dry.}

All you need is a bowl and a piece of coordinating tissue wrapping paper.


Choose a bowl that is slightly larger than the flower pot.
My bowl is an unlikely candidate, with that Pittsburgh Pirates logo!

However...on the other sides,
it's a lovely plain white, with a slim black line around the rim.
It's perfect for my blog photos
and the logo doesn't show from most angles.


Next prepare the tissue wrap.
All you need is one piece, and it can be slightly wrinkled.
Cut 8 to 10 rectangles from the tissue paper,
each measuring about 6" x 10". 
Hold each one in the center, and shape it into a tuft,
as shown in the photo.


Place the flower pot into the bowl,
and tuck the tissue tufts in between the two containers,
until you are pleased with the fluffy layer.


That's a lot better!
My primrose has a pretty tutu for her blog debut.


I hope you'll find a way to brighten your spring days, too!

{Stop by again soon to see more of that table topper!}


Pin It

May 13, 2015

Spring Petals Table Topper QAL - Color Me Retro

Hello, Friends!
Have you been quilting along


This quilt along came along at just the right time for me!
I was ready for a new table topper for my kitchen table,
and I had just the right stash of fabrics on hand.


The Crafty Quilter did such a great job planning this
quilt along. The pace was just right - a new lesson each week,
with extra time to add linky photos at the end.
All fun...no stress!

I took this opportunity to use my fat quarters of
Color Me Retro fabrics by Jeni Baker for Art Gallery.

{They have adorable names...Florette, Kitchenette, and Dulcette.}


I've had these prints since they were first released,
and it's about time I used them to brighten my kitchen.
I had some fun positioning the background prints
in a directional design.
For the triangle edges, I chose the violet floral stripe.


Here's how my table topper looked
with the background stitched and petals fused into place.
I think my favorite step in this project
was deciding how to place the petals!


Next I appliqued my petals using my Pfaff's blanket stitch.
I love that stitch, and it's the reason I chose my machine 14 years ago.
After all of the petals were stitched, I added the petal centers.


What a difference those centers made...they brought out the lime.
This was such a pleasant surprise, because I'd already
planned to use a lime polka dot for the binding.


For the quilting, I decided to go lightly.
I stitched around each petal,
plus added a right angle to echo the violet triangle shapes.

{I forgot to take this shot before the project was finished.} 


{You can see the overall design best on the back.}


Let's do a bit of time traveling...back in time from the photo above!
After the quilting was completed, I carefully trimmed the table topper.


So, what about binding all of those corners, including the inverted ones?


Oh, The Crafty Quilter has a tutorial for that!
I'm not gonna lie...it was a bit tricky,
and it took like.for.ever to handstitch the binding
to the back, but it was really worth it!


I love my finished table topper...it's something I'm keeping,
just for myself. It will make me think of my friend Julie,
The Crafty Quilter, and all of my friends who quilted along.


I bet I'll make another one someday!


Pin It