Showing posts with label recipe. Show all posts

October 3, 2014

Peanut Butter No-Bake Cookies - A Recipe to Share

If your back-to-school days have been
anything like mine,
there's just not much time for baking.
That's why I love stirring up these
Peanut Butter No-Bake Cookies!


Here's how I make them...starting with these ingredients.


Peanut Butter No-Bake Cookies
                        2 cups sugar                   1/2 cup peanut butter
                        1/2 cup butter                 1 tsp. vanilla
                        2/3 cup evaporated milk   1 1/2 cups salted peanuts
                        3 1/2 cups oatmeal (regular or quick-cooking, uncooked)

Mix sugar, butter, and evaporated milk in a medium saucepan.
Bring mixture to a rolling boil, and boil 5 minutes,
stirring frequently to prevent from burning.
Remove pan from heat and stir in peanut butter and vanilla.
Now fold in peanuts and oatmeal.
Spoon onto foil-lined cookie sheets, shaping into cookies.
Makes about 5 dozen cookies.

Once you've got the cookie "dough" ready,
you'll want to work quickly to drop them onto the foil.


 The cookies set up in a few minutes, as they cool off completely.


This recipe makes quite a few cookies,
but they're very tasty, so people tend to eat lots of them.


It makes enough to fill two full cookie sheets.


Wouldn't you like to welcome home someone special,
with some sweet treats like this?


Now I just need to come up with a sweet No-Sew project,
for these busy days when I can't get near my sewing machine!

{Hey...that's not a bad idea! I think I'll see what I can come up with.}

Until then, I hope you'll enjoy this recipe!


Pin It

November 25, 2013

Apple Dapple Cake for Across The Pond Sew Along

Remember that I picked APPLES
for this month's Across The Pond Sew Along?

{Okay, I didn't actually pick any apples, but you know what I mean...}


When I chose APPLES,
I planned to share one of my favorite
apple recipes with you,
and now...I give you Apple Dapple Cake.


My grandma gave me this recipe many years ago,
but I never tried it until about 10 years ago.
Now it's one of my favorite cakes in the whole world.

{Sometimes Grandma knew me better than I knew myself.}


I LOVE that I've still got my recipe card, 
handwritten by Grandma herself.
I miss her every day!
Are you ready for some Apple Dapple Cake pictures?

{I can't resist including my Quilty Fun apple blocks!}


Here's all the stuff you need for the cake part.

{There's also a yummy topping that I'll show you how to make.}


I like using my vintage Pyrex bowls
for making old-fashioned goodness in my kitchen.


Look how many apple slices
I got, just from those 4 MacIntosh apples!


Here's the recipe,
so you can try it yourself.
It's very easy to make
and my husband pronounced it DELICIOUS!


Apple Dapple Cake

Cake Ingredients:
4 cups thinly sliced apples
1 cup cooking oil
3 eggs
2 cups sugar
1 tsp. baking soda
2 tsp. cinnamon
3 cups flour
1 tsp. salt
2 tsp. vanilla
Optional:  1 cup chopped nuts

Peel and slice the apples and set them aside.
In a large mixer bowl, combine oil, eggs and sugar.
Add baking soda, cinnamon, flour, salt and vanilla,
and beat until completely blended.  Batter will be thick.
Fold in the sliced apples, mixing into the batter.
Pour the cake batter into a greased 9 x 13" cake pan.

Bake for 45 to 50 minutes at 350 degrees,
until edges are golden brown and a toothpick tests clean.

Topping:
1 cup brown sugar
1/4 cup milk or cream
1/4 cup butter

For topping, combine ingredients in a small saucepan
and melt them together over low-medium heat.
Bring to a boil while stirring,
and allow to boil for 4 minutes.
Pour topping over warm cake.

Lastly, put the cake pan, with topping, on the upper shelf in the oven,
and broil to let the topping bubble, just for about 1 minute,
or until it turns golden.
Remove from oven and let cool at least partially,
before serving.


Tastes great warm or at room temperature,
with or without creamy vanilla ice cream!

Enjoy your apples this month,
and show us what you've made in the Flickr group.


By the way...
did you notice my mug rug, serving up the apple cake?
It's actually a little bit bigger than a mug rug...

more like a placemat, or a mini quilt.


This little quilt is available for sale here in my eamylove shop on Etsy.
Even the back shows off the elaborate quilting.

{I love the pear green backing, Dandelion Girl by Fig Tree Quilts.}


Pin It

July 3, 2013

Happy Birthday, America!

Happy 4th of July!


Today I'm sharing a few of my favorite
things that represent the good ol' USA...

Baseball hs been called America's favorite pasttime.


These photos are from last year,
but I really love them.


I'm going to miss baseball, now that the local league's season has ended!

{Good thing the Pirates play all season.}


Another thing Americans love is cooking out in the summertime.
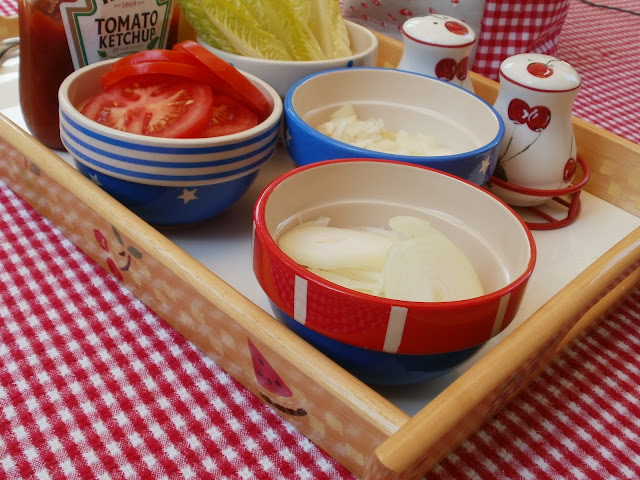
I found some cute little bowls at Target,
just right for serving hot dog and hamburger condiments.

{My sister Susie hand-painted the details on the tray!}


We're going to a picnic,
and I'm bringing a Chocolate Bundt Cake.
I got the recipe from Cooks.com
and I'll share it with you!

{It's sooooo easy!}


CHOCOLATE BUNDT CAKE

Chocolate cake mix - 2-layer size
3-oz. package instant chocolate pudding mix
1 3/4 cup milk
2 eggs
12-oz. package chocolate chips

Mix all ingredients by hand, just to blend, in a large mixing bowl.
Pour the batter into a greased bundt pan.
Bake 50 minutes at 350 degrees.
When the cake has cooled, invert it onto the serving plate.

I put together a glaze, made with 1 cup of powdered sugar,
3 Tbsp. of cocoa powder, and about 2 -3 Tbsp. milk.
I drizzled the top of the cake with the glaze.

{Mmmmmm...}


Happy Birthday, America...
God Bless the USA!


Pin It

July 31, 2012

Zakk-ini Bread Basket

We are now in Week #18 of the Zakka Style Sew Along,
and it's never too late to join us.

{Visit Lindsey at  LRStitched for details.}


I love this week's project, contributed by 
Rachel Roxburgh of Roxy Creations.

{Rachel has a way with linen, wouldn't you agree?}


Already I've seen several versions from the sew along,
and they are all just as darling as the model from the book.

I had already started to make mine before I saw the others, which
are mostly light-colored and very cheery.
Mine is kind of dark, since I opted for my charcoal gray linen,
as the main body.  I also used a navy plaid homespun for the handles.

I can't believe I didn't think of using gingham, like 
Tamiko and Amanda did for their baskets!

{I still love it, though!}


I've seen some beautiful buttons out there, too.
For mine, I made a covered button to match the handles.

{One of the most fun steps was braiding the little loop from string!}


I love this print from Recess by American Jane,
for the interior.  

{I also love the way the handles tie into a sweet little love knot.}

What's that inside the bag, you may ask?

Why, it's a loaf of homemade zucchini bread,
and as your reward for sticking with me, 
I'm going to share how to make it, right now.

{You may find the printable version of the recipe for
here at allrecipes.com.}

Start with a nice big zucchini...
I live in Pennsylvania, and our local gardens
are always bursting with zucchini.

{Like my Dad always said, I don't have a garden, but I cultivate friends with gardens.}


Use a grater to shred the zucchini into a bowl.

{Just shred the whole thing, and freeze the rest in plastic bags, with 2 cups in each bag.  This particular zucchini will make 8 loaves of bread!}


I love to collect all my ingredients and pretend I'm on a cooking show.
Here's all the stuff needed for this recipe.


Mix the eggs, oil and sugar in a large mixing bowl.

{You may use a mixer, or just stir everything together for this recipe.}

Stir in the zucchini and vanilla...


And then the dry ingredients, which have been sifted together.


Pour into two prepared loaf pans.


When they are baked, they have a wonderful, slightly chewy crust, 
and the inside is tender, with tiny green flecks of zucchini peel.

{The first time one of my sons tasted it, when he was very small,
he said, "Mmmmm...I'll have some more of that bikini bread, please!}


Now,I must say that when I pictured this bread basket, 
I thought it would be a lot larger...

{"Is it bigger than a bread basket?"}


Although it's not big enough to hold a regular loaf of bread,
it is just right for pesenting homemade goodies,
which makes it even more appealing!


Pin It