Showing posts with label cherries. Show all posts

September 21, 2015

Farm Girl Vintage Blocks - Peas, Carrots and Lots More

Now, where we?...
Life interrupted our conversation about my
Farm Girl Vintage blocks.
The last time I blogged, I was talking about the
Pumpkin season seemed so far away...
and now it's almost autumn!


I'm so tempted to skip ahead and show you
my blocks that match up with the sew along...
but let's stay in alphabetical order,
so I won't miss any.

{This book is so much fun that I'm making every single block in it.}

So, the next block in the book was the Peas and Carrots block.
Yay!
After making that pumpkin,
I decided that my finished quilt is going to need some more orange.

{Do you have orange-o-phobia? You really should get over it. 
Some pretty orange fabrics are very therapeutic...trust me.}


I thoroughly enjoyed stitching this block.
I've been skill-building as I work my way through the book.


Oh.My. How I looked forward to making the next block...
Pie Cherries!
This block was probably the deal-breaker block.
I couldn't wait to buy the book after seeing these cherries.


To be honest, I feel a wee bit of disappointment
in my version of the block.
Check it out - my stems are not as uniform as they should be.


But never mind...my pie bird loves these cherries just as they are.


I adore cherry red color anywhere in the kitchen.
It's so retro.


Next in the book is a simple little Pinwheels block.
It's a classic favorite, fun to make, and oh, so cute!


I followed my own tips, and I chose prints of similar value.


I think my favorite one is...that orange one.

{What is the opposite of orange-o-phobia? I have that.}


Have you ever made a Postage Stamp block?
I really want to make an old-fashioned quilt made
entirely of postage stamp blocks, using all of my favorite fabrics.


You don't even need a pattern to create these blocks from 1 1/2" squares.


Just use an accurate scant 1/4" seam, and the squares line up perfectly.


Ahem...almost all the time.


Just because we're best fabric friends,
and I know you love fabrics almost as much as I do,
I'll show you some more close-ups of my postage stamp block.


Just one more photo, to say goodbye for now.
Come back soon to see more of my Farm Girl Vintage blocks!


Pin It

March 27, 2014

Springtime in the Kitchen

Home Sweet Home...
We've just returned from a family trip to Florida!
Those warm sunny days make me wish spring would
hurry up and make its way to Pennsylvania!

{I picked up some daisies to brighten the kitchen, while I wait.}


made from some happy red gingham


Well, I've used it again to add some more cherry pop
to my country kitchen.
I started with a little cherry berry basket,
made using this tutorial from Noodlehead.


Paper napkins are very lovely in my basket...
but so are GINGHAM napkins!
All I did was hem some 14 1/2" squares of gingham. 
Since they are woven, there is no "wrong side."

{I always say, you can't go wrong with gingham.}


Next on my wishlist for my cherry kitchen
was a little counter topper,
made to match the table topper.


How did I do it?  Simple!

Cutting:
(6) 2 1/2" x 15" cherry strips
(6) 2 1/2" x 15" gingham strips
(1) 12" x 15" Pellon ShapeFlex SF101 interfacing
(1) 12" x 15" cherry backing

At least 1 1/2 yds. Ricrac - 5/8" wide 

Sewing:
Stitch the strips of fabric together
with a 1/4" seam, pressing each seam to one side.
When finished,
the patchwork measures 12" x 15".
Fuse the SF101 interfacing to the 
back of the patchwork, to give it wonderful shaping.

Next baste the gingham in place
just less than 1/4" from the edges of the patchwork.

Pin the patchwork top and the cherry backing
wrong sides together, and stitch just inside the basting,
so that the previous stitches will not show.
Leave an opening on one side for turning.
Turn the topper right sides out,
and smooth out the ricrac along the edges.
Press well, then topstitch near the edges to finish!


I think it looks just great on my countertop.


You know what else?  


It's reversible!


 It makes me smile to see those little aqua dots
in the background of the cherry print.
I really love decorating my kitchen with cherry pop!


Soon the sunny days will be here at my house,
and I'll be making some fresh food...


and sewing some fresh new projects.
I've got a new set of fabrics from Terry's Fabrics to show you!
Come back soon to see what's cooking!

{I'm happy to be the newest contributor for the How To Blog at Terry's Fabrics! 
Head on over to check out more great ideas...}


Pin It

February 28, 2014

Skinny Pinnie - Received!

We are closing out our 
By now, everyone should be mailing
and receiving their finished pinnies.

As the "swap mama" I had the luxury
of choosing my partner,
and I selected the lovely and talented
Beverly, of golfingbev on Flickr.

Look what came in the mail for me,
courtesy of Beverly!


There is so much goodness in here,
starring the most adorable...
and petite...skinny pinnie,
composed of teeny tiny hexagons!


See that needle book in the background?
It's made to match the pinnie,
that I must try someday soon.

{Sigh...}

{Photo by golfingbev on Flickr}
There are little treasures I'd never seen before,
such as Japanese zippers...
with French sayings...


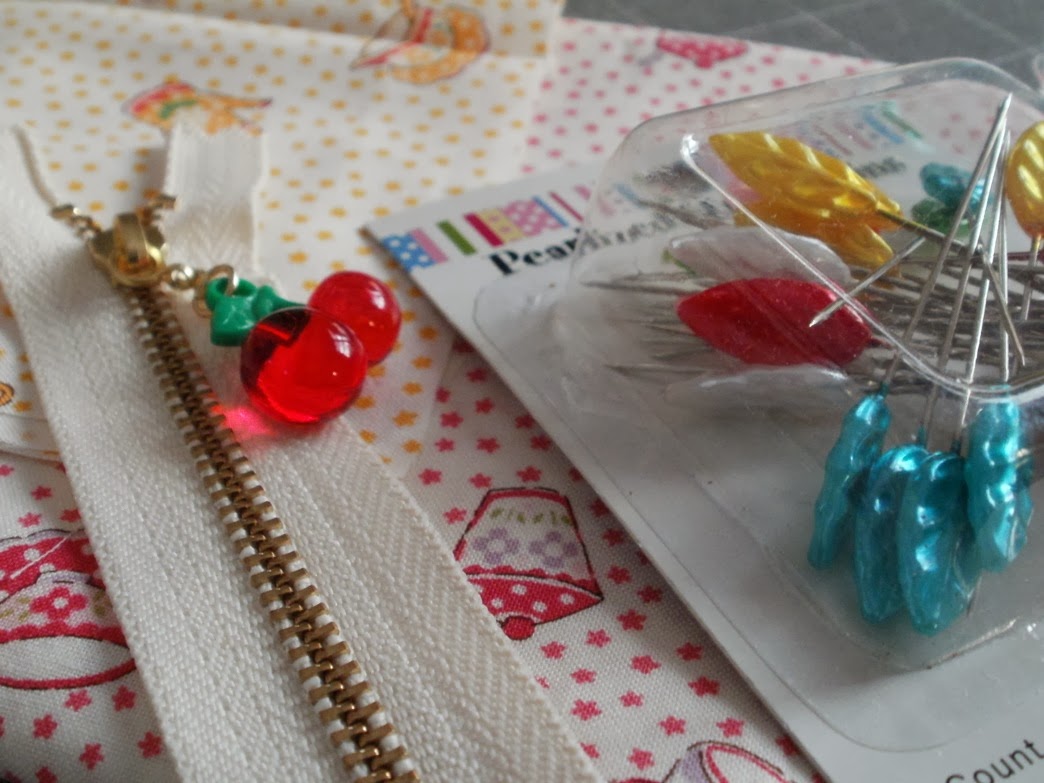
Or little cherry zip pulls!


There are Japanese sewing and crafting goodies galore
in this little stack of sweetness.
I love each one to bits!

{Everything was all bundled up with bits of Washi tape!}


There was something old...vintage feedsacks!


And something new...this handy Seam-Fix
seam ripper with a little thing on top
for picking up the snips of thread.

{Of course I may never need to try that tool, since I'm such a perfect stitcher. Ahem...}


There are more fabric samples, too...
little teapot prints I had admired on Bev's Flickr site...


and even a Glamping mini charm pack!

{Can you find it, among all of the treasures?}


And look at this darling little tag!


I first noticed Beverly's sewing talents
during the Zakka Along 2.0 Patchwork, Please sew along.
Beverly has a distinctive style,
mixing bits of fabric to create detailed treasures
that leave me breathless.

Check out her photostream, and you will see what I mean!

Beverly's Patchwork Please Apron - Polka Dot Cafe
Thank you, Beverly, for spoiling me rotten!

{I will be able to trace my new Japanese sewing fixation to this magic moment.}


Pin It

August 21, 2013

Patchwork Please - Happy Hexagon Trivet

Thank goodness I've got Bloglovin'...
otherwise I may not have realized that
this week's Patchwork, Please Zakka 2.0 Sew Along
is all about the Happy Hexagon Trivet!

This sweet project was one of my must-makes,
from the first time I paged through my copy of the book.


I see that it is rated 2-stars on the difficulty scale.

There must only be 2 stars on that scale,
because I found this project to be
a lot more complicated than I expected.
I made the mistake of trying to blend
regular paper piecing and freezer paper template
techniques.

{Note to self:  Don't ever do that again!  Try just the normal paper piecing.}


That being said,
I'm super excited about the way
my new mug rug turned out.

I'm showing off one of the three Cath Kidston
mugs I purchased a few months ago.

{They are among my most loved possessions.}


Let's get to the "likes" and "dislikes" for the project...
dislikes are always first.

Right off the bat,
I was highly disappointed that the paper
piecing pattern requires enlarging.
Oh.My.I.Hate.That.Part.

In the end, the entire pattern still fit on a single page of paper.
Why couldn't the publishers have printed it at actual size???


I was going to bind my project as described in the book,
but my outer fabrics would have been nearly covered
by the thick binding.
That's most likely because I didn't remember
to cut the outer edges plenty large enough to allow
for a decent seam allowance.


That brings me to the Likes.
with a 1 1/2" single fold binding.
It worked pretty well, even on the angles.

{Like:  new skill acquired.  I had never bound a hexagon before.}


Also, I really like the size of this project.
There's plenty of room for a large mug and a snack.
Alternately, a little tea pot would fit perfectly on this trivet.


I also like the way it looks on the back...
just as cute as the front, really!


Most of all, though, the best Like for this project
is that it is such a beautiful design.
Ayumi's gifts are being shared all over blogland.
Her version is exquisite,
and I love every variation I've seen so far, being made by others.

I love cherries in the kitchen,
and this project was great for using
a variety of cherry prints and polka dots I've been collecting.


Maybe time will help me to forget
all of the labor pains I withstood,
to end up with my lovely mug rug.
A nice cup of tea will also work wonders!
Pin It