Showing posts with label summertime. Show all posts

June 6, 2017

Summer Fun - Red White and Blue Zippered Pouch

Hello, Friends!
Who's ready for summertime?
I am!!!


Whenever I need a nice gift, I like to make a new version of
the Open Wide Zippered Pouch,


I've made so many of these...
and I've never been disappointed with the results.
This time I chose some red, white and blue fabrics
that I bought from Connecting Threads a few years ago.
The line was called Smooth Sailing.

{I love the anchors, all lined up!}


The addition of gray to the 
traditional patriotic palette looks so smart! 
That's why I chose a gray zipper to bring it out.
The lining fabric is a gray dot,
with a little red star popping up every so often.


The red and gray stripe provides a nice contrast 
for the bottom of the pouch.


I use Pellon ShapeFlex SF101 interfacing on my pouches,
for all of the exterior pieces, as well as the lining.
It adds soft shaping, and the pouch
is stable enough to stand, even while it's empty.


Once I've finished making one of these pouches,
I often add a ribbon for the zip pull.
I found this red gingham and could.not.resist.


I hope you'll have time for some summertime sewing, too!


Pin It

August 9, 2014

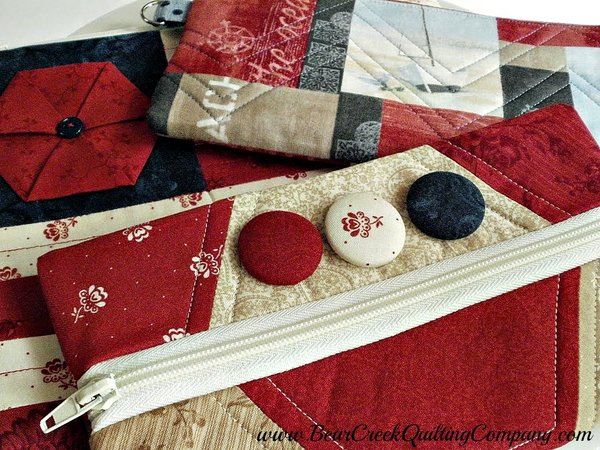
Hexie Flower Tutorial and Summertime Pouches

Today I'm blending two of my latest fascinations:
hexagons and zippered pouches!

Pop over to visit
where I've guest-blogged in detail
about these Red, White and Blue


While you're in the neighborhood,
shop around at Bear Creek Quilting Company...
you never know what goodies you'll find there.

Besides yardage and pre-cuts,
in any color you want.

I used a few spools of Aurafil thread
when I made my summertime pouches,
and the stitch quality was just gorgeous.


The stitching is
just as pretty on the back as the front...
a true sign of a good quality thread,
along with the right tension on my sewing machine.


I used a Honeycomb pack of Midwinter Reds
by Minick and Simpson for Moda
for two of the summertime pouches.

{Midwinter Reds really work for midsummer stuff, too!}


Would you like to see a detail of 
how to make the hexie "flower"
on the flag pouch?

{Yes, I thought you would like that!}


Start with a hexagon of any size...
mine came from a Honeycomb pre-cut,
so they are 3" on each side.

{They measure 6" from point to point, according to the package.  That would be from one point to the one directly across from it.}


Begin by turning the hexagon over,
wrong side up,
and fold every other corner
to the center,
pressing with a hot iron as you go.

Here's the first corner folded...


and the second...


and the third.

{All three corners meet neatly in the center. It's okay to have a wee bit of overlap.}


Now you've got a triangle.
Take each of the three points,
and fold them to the center,
pressing them into place with that hot iron.


That's so easy, right?
Now tack those center points together
and use a little button to finish it off.


Starting with a hexie that measures 6",
the flower finishes at about 1 3/4" on each side.


I place my hexie on the front of my flag pouch.


I'm sure I'll use this accent for many more projects.
I hope you'll try making hexie flowers, too!


Pin It