July 11, 2013

Welcome to the Christmas in July Blog Hop - Christmas Tree Topiary Pillow

Welcome, everyone!
It's my pleasure to present the first project

I've designed a free pattern, just for this event.
Introducing...
the Christmas Tree Topiary Pillow!

{At the end of the tutorial,
there is a GIVEAWAY, too, so be sure to read all the way to the bottom!}


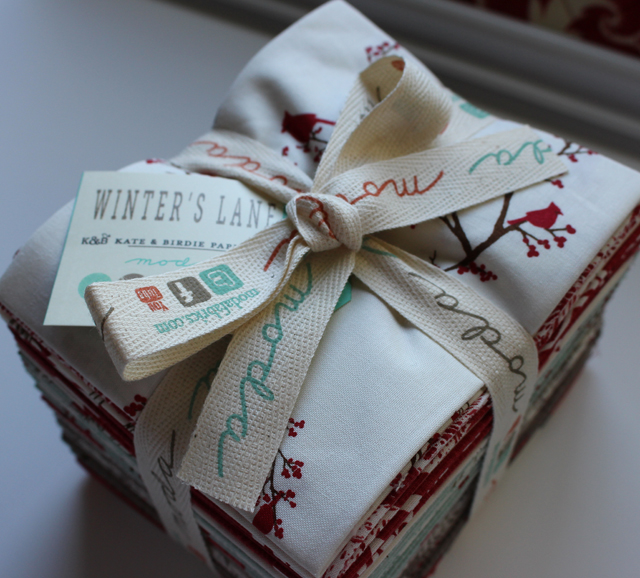
The Crafty Quilter blog is where I first saw this gorgeous line
of holiday fabric...Winter's Lane
by Kate and Birdie Paper Co for Moda.

{It had me at "hello".}

Photo from The Crafty Quilter blog
Through the luckiest coincidence,
 I recently WON a fat quarter bundle
of this stunning fabric range!

It coordinates so nicely with my living room couch,
that even my son said I should use it to make a lot of pillows!
I'm off to a good start already.

I chose some favorite prints from my bundle.


To make the pillow, you need the following supplies...

FOR PILLOW TOP:


Heat N Bond, or other fusible web for applique shapes
(1) 15" square of background fabric
Scraps or charm squares of several different prints
for tree "seed" appliques
(1) 5" wide x 3 1/2" tall fabric scrap for tree base
(2) 2" x 15" strips of top and bottom border fabric
(2) 2" x 18" strips of side border fabric
(1) 18" piece of Pellon 987F Fusible Fleece for front of pillow

FOR PILLOW BACK:


(1) 18" square of fabric for pillow backing
(1) 18" square of Pellon SF101 ShapeFlex fusible interfacing
(1) 4" x 18" strip of fabric for zipper flap
(2) 1 1/4" x 6" rectangles of fabric for zipper extensions
14" zipper in coordinating color

Click to Download TEMPLATES for ChristmasTree Topiary Appliques.
Be sure to print using the printer icon,
and use the actual size or no scaling option.
(Seed shape measures about 2" from end to end
and about 7/8" wide.)

Trace a total of 30 applique "seeds" onto the paper side
of Heat N Bond fusible webbing.
Cut the shapes apart roughly, not on the drawn lines.
Place the shapes on the WRONG side
of the fabrics you are using for the tree applique
and iron in place according to manufacturer's instructions.

Cut the seed shapes out carefully,
following the lines that were traced.  Peel away the paper
from the backs of all of the applique shapes.

DESIGN TIP:
For my tree, I tried to suggest snow, covering the upper boughs.
I chose the lightest prints for the top-most rows,...


and placed darker fabrics in each lower tier.


For the base of the topiary,
draw the Base template 
on the paper side of Heat N Bond webbing.
Cut the base shape out roughly, not directly on the drawn lines.

Fuse the piece of webbing to the WRONG side
of the tree base fabric,
as directed by the manufacturer.
Cut the shape out on the drawn lines,
then remove the paper backing.

Lay out all of the tree appliques,
in rows as pictured,
centering the design on the 15" square of background fabric.
Fuse all of the pieces into place,
following manufacturer's directions for the fusible webbing.

TIP FOR PLACEMENT:
There is one seed on the top, with 2 seeds in the next row.
The third row has 4 seeds, the fourth row has 6 seeds,
the fifth row has 8 seeds, and the bottom row has 10 seeds.


Next add border strips to the top and bottom,
then the sides, of the 15" square background.
Press all seams away from the center block.


Fuse the square of Pellon 987F to the back of the pillow top.

{Alternately, you may use a layer of batting and a muslin backing,
to create a quilt sandwich. 
 Personally I prefer the smooth finish of fusible fleece, 
and it doesn't shift during the quilting process.}

Stitch around the edge of each of the applique pieces.
I used a slightly shorter stitch length setting of 2.0
and it was very easy to negotiate the gentle curves,
even without lowering my feed dogs!

{If you like, you could blanket-stitch or zigzag the edges.  I just used a straight stitch this time.}


I stitched around the base, the same way.
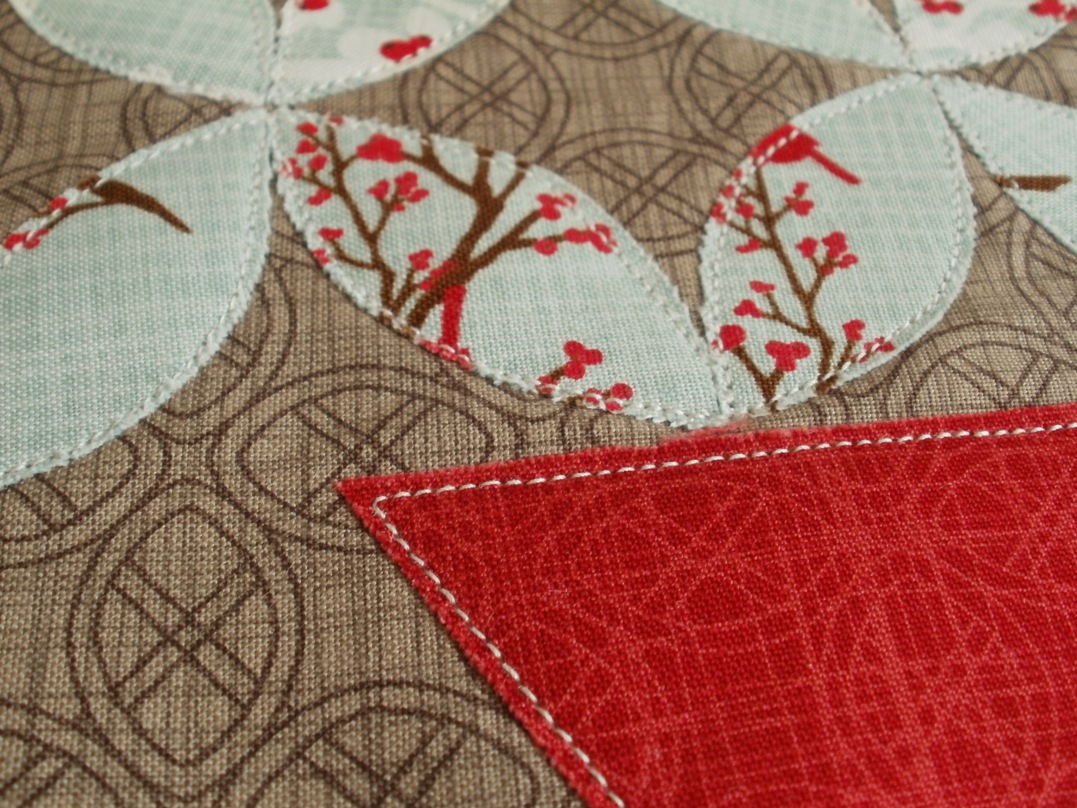

For the borders, I stitched in the ditch.
If you like, you may add lots more quilting.

{Here's how mine looked on the back.}


To me, this pillow top seemed finished at this point.
Well...except...I decided to fuse one tiny little cardinal
onto my favorite bough.

{I love the dash of red this little bird adds...just like in nature!}


Now that the pillow top was complete,
to finish off my pillow.

{Here's the link for the PDF of the tutorial.}

I made one important adjustment for my backing,
since this pillow was going to finish at about 18", not 16" square.
I cut the zipper tabs a little bit longer,
so that the finished zipper would be wide enough.
The tab pieces I used this time measured
1 1/4" tall x 6" wide.

Here's the back of the finished pillow.
I think it's just as lovely as the front,
and I had the chance to use more of the tiny cardinals.


I added my signature label.


The finished pillow measures about 17 1/2" square.
It could be adjusted to make a pillow that is smaller,
(with no borders) or larger, with wider borders.


My new Christmas Topiary Tree Pillow
looks at home already on my chocolate brown couch.

{It's going to have to wait for a few months, though, before I use it.}


How would you like to WIN a kit
for making your very own Christmas Topiary Tree Pillow?

I like the way my pillow turned out,
but I'd love to put together a different kit for one lucky individual,
with all of the fabrics, fleece, interfacing and zipper,
for you to make your own Christmas pillow.

The fabrics and colors will NOT be the same as in my sample,
but I'll pick out something pretty...I promise!

To enter for the random prize drawing,
please comment below, telling me
what your favorite Christmas cookie is!

Comments will close at midnight on July 26, and 
I'll announce the winner on this blog post on July 27.
Please make sure I can contact you via email,
especially if you are a no-reply blogger.

Good luck, everyone, and come back any time!


Comments are now closed for this post.
Congratulations to Shawn, comment #27!
I've contacted Shawn via email.

Thanks to all who entered the giveaway...
good luck next time!


Pin It

July 3, 2013

Happy Birthday, America!

Happy 4th of July!


Today I'm sharing a few of my favorite
things that represent the good ol' USA...

Baseball hs been called America's favorite pasttime.


These photos are from last year,
but I really love them.


I'm going to miss baseball, now that the local league's season has ended!

{Good thing the Pirates play all season.}


Another thing Americans love is cooking out in the summertime.
I found some cute little bowls at Target,
just right for serving hot dog and hamburger condiments.

{My sister Susie hand-painted the details on the tray!}


We're going to a picnic,
and I'm bringing a Chocolate Bundt Cake.
I got the recipe from Cooks.com
and I'll share it with you!

{It's sooooo easy!}


CHOCOLATE BUNDT CAKE

Chocolate cake mix - 2-layer size
3-oz. package instant chocolate pudding mix
1 3/4 cup milk
2 eggs
12-oz. package chocolate chips

Mix all ingredients by hand, just to blend, in a large mixing bowl.
Pour the batter into a greased bundt pan.
Bake 50 minutes at 350 degrees.
When the cake has cooled, invert it onto the serving plate.

I put together a glaze, made with 1 cup of powdered sugar,
3 Tbsp. of cocoa powder, and about 2 -3 Tbsp. milk.
I drizzled the top of the cake with the glaze.

{Mmmmmm...}


Happy Birthday, America...
God Bless the USA!


Pin It

June 30, 2013

Christmas in July

If you're like me and you love Christmas,
you are going to love what's coming up this month!

First off, we'll have fun with the
Across The Pond Sew Along.
Susie has selected the theme for
this month, and it is
"Christmas in July!"

{I can hardly wait to see what Susie and Amanda are dreaming up.}


Also, I invite you to join the blog hop over at
as Julie hosts a new Christmas project
every day between July 12 and 19.

{I'll have something new and special to share, too!}


Here is the schedule for The Crafty Quilter blog hop:


July 12:  Amy - Amy Made That 
July 13:  Amanda - The Patchsmith
July 14;  Elaine - Summercrafter
July 15:  Sarah - Sarah Rose Quilts
July 15 - Patricia - Quilting Lines
July 17:  Sheri - Sunshine in the Attic
July 18:  Julie - The Crafty Quilter
July 19:  Wrap Up and prizes


Now, if you've been reading my blog all year,
you already know that I've been making
at least one Christmas-y project
each month, all year long.

{Nothing like waiting until June 29th to start this month's project!}

I decided to make some Holiday Gift Tags,
using the free patterns and tutorials
from Pretty by Hand and Nana Company blogs.

{I've had my eye on these beauties for such a long time!}

Photo from Nana Company blog

I had all the stuff on hand,
and just needed to collect everything and print the templates.

This is a really quick and fun project.
I was able to stitch up the basic tags very quickly.
I used some Pellon Decor-Bond
for the fusible interfacing.
It was easy to trace the pattern and cut out the shapes.

I added a bit of trim before I stitched the layers together.


The top-stitching helped to define
the curves on the fancy shapes.

{TIP:  I shortened my stitch length juuuuust a tad to 2.0.}


I used a Darice kit for making little teeny eyelets.
How easy!


Here's the reverse side...also very pretty.


Hmm...don't you think they still needed
a little something "extra"?

I got my little buttons out,
to see if any of those would work.


 Oooooh.  That's much better!


Then I had a couple of bright ideas.
I made this little folded hexagon,
and added that pretty red button.


I made the tiniest yo-yo
and added another button
I'd saved from a favorite dress.


I can't wait to make some more!


Maybe I'll just add a sticker on the back
with the "to" and "from" names.

{See the comments below for BETTER ideas!!!}


I would love to be able to use these over and over
through the years.


All in all, not a bad finish, for the end of June.
Come back often in July for more great Christmas ideas!


Pin It

June 27, 2013

Polka Dot Cafe Apron - Zakka 2.0 Week #4

What's cookin' at your house?
Here at mine,
I've whipped up a little Polka Dot Cafe apron,


Grab a tall glass of sweet tea,
and get ready for a lot of pictures of my version of
the Polka Dot Cafe Apron.

In my humble opinion,
I used some of the cutest fabrics on earth,
from Lori Holts' Bake Sale for Riley Blake.


I decided to use the same print for the center squares on each block.


I love the way they look with my

{Do you see those tiny little spatulas on the green and blue block?}


Shall we "dish" about my likes and dislikes?
Dislikes are always first...

Okay...I haven't seen this mentioned
in anyone else's posts,
but the cutting instructions say to cut 4 of the 
large squares.

Um...there are 5.  The one in the center
is a different print, but the same size
as the four squares around it.


As much as I have joined in the lament that
this book lacks diagrams,
I found this project's piecing diagram to be very confusing.
The instructions said "Sew
in the order shown...," and referred to the figure,
but there were 5 #1's in the diagram.

{I did figure it out, but only because I'm an experienced sewist.}


The templates...oh, I didn't use those.
I measured them in the book and kind of rounded them up a bit
to the nearest 1/4" figuring I could trim them to size.

{I believe she meant to advise using freezer paper for templates, but it didn't come out and say it like that in the description.  Again, it was confusing.}


Oh.My.Gosh.
When I was finished making my blocks,
I barely had anything to trim off, as shown below.
I did not have 1/4" to spare, to preserve any points!!!

{My 1/4" seam can't be THAT far off!  How on earth did the template users manage, I wonder?}


This is one of those projects that looked like
it was going to be quick and easy,
but it took me almost all day to complete.

Maybe it was just because I kept stopping to look at how cute it was!


This is really a time-saving tip, rather than a "dislike"...
I pressed my binding in the same way as I made the apron ties.  
Rather than attach the binding as described,
I stitched it on "taco-style" in just one step,
enclosing the raw edges.

{How about that darling text print?}


I also added a 1 1/2" sashing between the blocks,
so I didn't have to try to line up all those "missing points" I had.


And now for some more of the "likes"...
Obviously,
the blocks themselves are just sooooo sweet!
I love that they are retro-style and allow the fabrics to shine.


I also like that the patchwork pocket
fit just right onto my plain turquoise tea towel!
What a nice shortcut for me!


My most favorite detail is just about the best "like" ever for me!
The sample has a little piece of fabric tape tucked into the side of the pocket.
I didn't have any decorative tape to coordinate,
so I just made a little fussy cut tab.


Would you like to see it really close up???

{I knew you would!}


Someday, I hope to adjust the measurements
to re-create this adorable little block,
points and all.

{If I figure it out, I promise to share!}


Pin It