September 6, 2013

Get Ready for the Pin It Blog Hop!

I love pincushions, and I can prove it!

I've made approximately one bazillion
Cathedral Window Pincushions.
I use this fantastic tutorial from My Go-Go Life.

{This was the first one I ever made, featuring Sherbet Pips puppies.}


More Cathedral Windows pincushions followed...
I showed pictures in this post...


and more in this post,
about the La Petite Ecole series.


I've made other styles of pincushions, too.
Here's one of my personal Pinnies,
made using a pattern from Details by Des...


Remember my Zakka Style pincushions?
There were some with sewing kits...


and some all by themselves.


I even have a Blurb photo book
about some of the pincushions I've made.

You can make your own Blurb book about...anything!

Save 15% until Sept. 9, 2013 with code TAKE15.


I rest my case...I really love pincushions!
That's why I joined the Pin It Pincushion Blog Hop
over at Sew We Quilt.


Beginning September 10, 
check out these bloggers every day to find
new pin-spiration!

{I'm scheduled for the last day. Special thanks to Kristen at Meadowbrook for cheering us on!}

September 10


September 16
I've got half a bazillion brand-new,
never-been-shown-before pincushions to share.
Stop back and see them on September 17!
Pin It

September 3, 2013

Liberty Granny Square Pillow

Today I'm so excited to be a part of the 
Liberty Stiles Pillow challenge,
hosted by Sew Mama Sew blog.

It's always a great day when fabric arrives at my door,
and this special delivery all the way from London
was received with a big old "Yee-haw!"


There were 8 fat quarters of the lovely
Liberty Stiles fabrics shown here.
For the Sew Mama Sew challenge,
we were asked to use at least four of them
to make a pillow.

{I chose to use the top 5 prints in the stack.}


I had a vague plan in my head,
and I cut a whole bunch of little pieces...
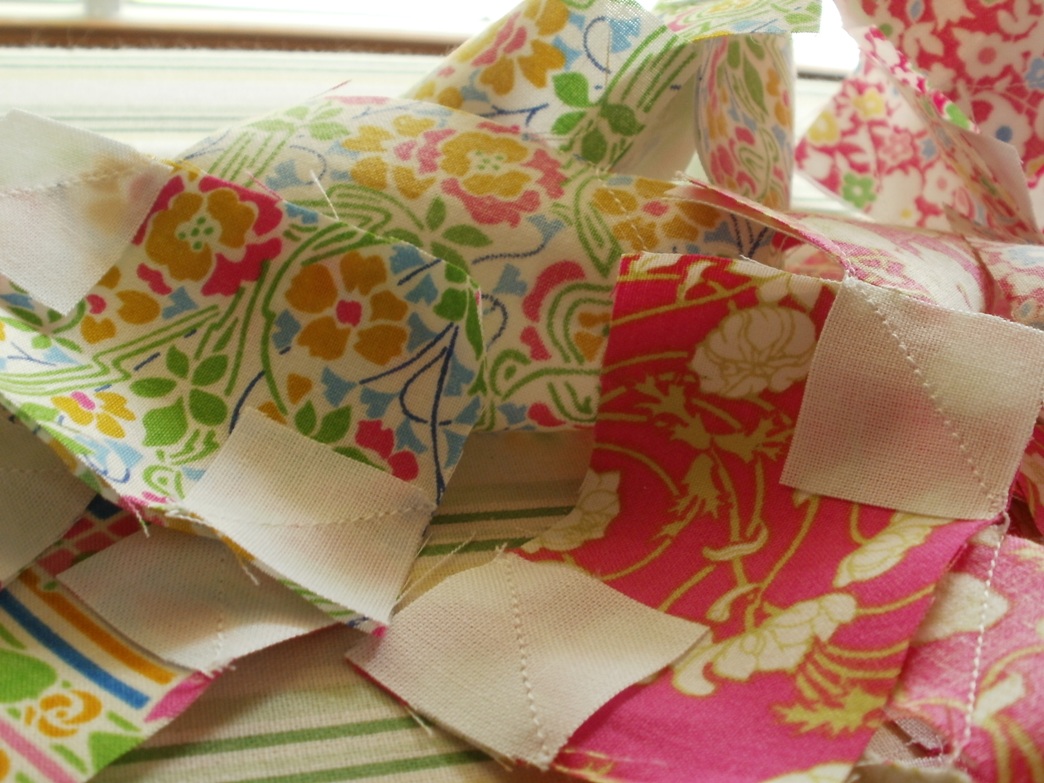
1" squares of white
stitched into triangles on opposite corners
of printed 2" x 3" rectangles.


When I put the rectangles together, though,
I was less than impressed.
The whole block only finished to 9" x 10"
and I was already too bored to make more
of those little blocks.

{Here's how they looked, lined up on my cookie tray, before I stitched them together.}

I pouted for a while...took a nap...then paid a visit 
to my Pinterest boards for inspiration.
Look what I found on my Pillows board...
a modern granny square pillow from s.o.t.a.k. handmade!

From s.o.t.a.k. handmade blog
I have a soft spot in my heart for the Granny Square
quilts lots of folks made last year,

Svetlana used a single Granny Square block to
make such a simple but dramatic pillow!
It seemed to be just what I was looking for,
to show off the vibrant prints
against a fresh white background.

I spent next to no time cutting out the 3" squares
and stitching them into the block.


Once I trimmed the block,
I added mitered borders using two of the green prints.


I backed the finished block with some Pellon 987F fusible fleece
and a square of muslin to make a quilt sandwich.
Quilting was simple...
straight lines 1/4" away from the seams of the granny square
and parallel stitching along the borders.


Sweet!
Uh-oh...this pillow needed a good-lookin' backside, too.

{Don't we all?}

I picked up my rejected block,
stitched on some wide white borders,
and added soft support with Pellon ShapeFlex 
SF101 fusible interfacing.

Normally I make a pretty flap to cover the zippers
on my pillows,

This time I didn't need...or want...a cover
for that hot pink zipper.

{Wow!}


I left the zipper exposed,
and I am so in love with the way it sets off the back.

{My little "eamylove" label looks pretty cute, too, I think.}


I always enjoy a good challenge,
especially when it involves pillows and pretty fabrics.
Thank you, Sew Mama Sew, for choosing me to participate!

I think I'll settle down now with my Granny Square pillow
and a nice cup of tea in my white Cath Kidston mug.
I'm in the mood for a little bit of hand-stitching these days.


Stop by any time to see what else I'm making.

Pin It

September 1, 2013

The Keys to Success

Here in the USA, September means
"back to school," even though lots of classes
have already begun in late August.

I wonder if The Patchsmith had school
on her mind when she chose this month's
project for the Across The Pond Sew Along.
After all, education is the key to success.

Amanda has assigned us the topic called
Here's just one of the fun projects she has made,
to encourage and tempt us to join in the fun...
a bright little pouch for earbuds!

Photo by The Patchsmith
As if that didn't take her to the head of the class,
Amanda has made an equally smart
zip-pouch key-ring from a different tutorial,
and you can discover the source in The Patchsmith's latest post.


Not to be outsmarted,
I've been researching ideas of my own,
as I look for inspiration to make my key fobs and rings.

This awesome Ruffle Zipper Pouch

with Geometric Stitching gets an A+ in my gradebook!
The tutorial for this classy number comes from 
the blog called See Kate Sew,
as does the photo shown.


There are many instructive tutorials out there,
including this one from the fabulous Noodlehead blog,
called Lil Cutie Pouches.

Photo from Noodlehead blog
It's really fun to use a bit of hardware
like lobster clips, zippers, and D-rings to add a touch of class.

{These D's are perfectly acceptable for any student.}

Once you've mastered zipper installation,
you can graduate to many other types of pouches and bags,
so sign yourself up for some sewing time.

When you've finished your project,
be sure to show and tell in the Flickr Group for
the Across The Pond Sew Along.


Pin It

August 29, 2013

Big Sale at Tiny Prints

Hey, I just want to shout out
a big sale happening now at Tiny Prints!


UPDATE:
The daily deal described below is over now, but you're still in luck.

There's an awesome Labor Day sale happening all weekend long!
Head on over now to Tiny Prints and shop around.
The sale is 25% off sitewide!!!
Use code LABOR13 for the discount.

You'll have to hurry to take advantage of this one-day wonder of a deal.


Creating custom business cards is easy:


1. Visit their Deal of the Day Page. Click through to the business cards. Make sure to do so before 7:30 AM PT Friday August 30 to allow yourself time to finish your order by 8:00 AM PT.


2. Choose from hundreds of designs. Pick the one that best fits your personality.


3. Customize the cards. Pick your own fonts, add pictures to some designs, choose your favorite colors, and play with the design. Make it scream "you."


4. Double check your design. Make sure it looks like you want it to.


5. Checkout. When you checkout, use the promo code DEAL0829 for 50% off. 


That's it! Super simple, but you have to act fast. 


They'll be to your door in about a week. Then you just need to start handing them out!


{I'm a new affiliate of Tiny Prints, so you will be seeing posts and tweets from me periodically, to announce sales.}


Happy Labor Day, everyone!


Pin It

Christmas Pinwheels

As another month came to a close,
I found myself hustling
to make something else for our
as well as for my monthly Christmas project.

Christmas Pinwheels count for both!


While I was researching
ideas for the Pinwheel theme for August's
Across The Pond Sew Along, I came across this block.

It's called Flying Kite Pinwheel...so fun!


I found an error in this PDF for the block,
plus I didn't want my block to be as large,
so I decided to draft my own version.

I used some of my red/white/blue repro 30's prints,
as I'd done in my Daisy Pinwheel block.
These were my first efforts...
I love this one, but the points were too close to the edges!


Back to the drawing board!
This time I got the points right, but the blue triangle size was a bit off.


The third time was the charm, using my Cherry Christmas prints.
My method of making this block results
in a pair of blocks that are mirror images.
See how they spin in opposite directions?

{Oh, never mind...it's dizzying to figure that out!}


All it took was a wee bit of quilting to convert the 8 1/2" blocks
into a pair of pretty mug rugs for Christmas.


{Note to self:  Points on the edges will be hidden under binding.}


for Machine Binding, and it was a quick finish.


Here's the back of the red one.


Here's the green one, on the back.


And now I've got some cute mug rugs,
ready for Christmas cocoa and cookies...
when the time comes.


Have you made any pinwheels this month?
It's never too late!
Show off your finishes at the Across The Pond Flickr group.


Pin It

August 21, 2013

Patchwork Please - Happy Hexagon Trivet

Thank goodness I've got Bloglovin'...
otherwise I may not have realized that
this week's Patchwork, Please Zakka 2.0 Sew Along
is all about the Happy Hexagon Trivet!

This sweet project was one of my must-makes,
from the first time I paged through my copy of the book.


I see that it is rated 2-stars on the difficulty scale.

There must only be 2 stars on that scale,
because I found this project to be
a lot more complicated than I expected.
I made the mistake of trying to blend
regular paper piecing and freezer paper template
techniques.

{Note to self:  Don't ever do that again!  Try just the normal paper piecing.}


That being said,
I'm super excited about the way
my new mug rug turned out.

I'm showing off one of the three Cath Kidston
mugs I purchased a few months ago.

{They are among my most loved possessions.}


Let's get to the "likes" and "dislikes" for the project...
dislikes are always first.

Right off the bat,
I was highly disappointed that the paper
piecing pattern requires enlarging.
Oh.My.I.Hate.That.Part.

In the end, the entire pattern still fit on a single page of paper.
Why couldn't the publishers have printed it at actual size???


I was going to bind my project as described in the book,
but my outer fabrics would have been nearly covered
by the thick binding.
That's most likely because I didn't remember
to cut the outer edges plenty large enough to allow
for a decent seam allowance.


That brings me to the Likes.
with a 1 1/2" single fold binding.
It worked pretty well, even on the angles.

{Like:  new skill acquired.  I had never bound a hexagon before.}


Also, I really like the size of this project.
There's plenty of room for a large mug and a snack.
Alternately, a little tea pot would fit perfectly on this trivet.


I also like the way it looks on the back...
just as cute as the front, really!


Most of all, though, the best Like for this project
is that it is such a beautiful design.
Ayumi's gifts are being shared all over blogland.
Her version is exquisite,
and I love every variation I've seen so far, being made by others.

I love cherries in the kitchen,
and this project was great for using
a variety of cherry prints and polka dots I've been collecting.


Maybe time will help me to forget
all of the labor pains I withstood,
to end up with my lovely mug rug.
A nice cup of tea will also work wonders!
Pin It